
Cross-Compiling ITK for Raspbery Pi

| Index To the Series |
| 1. Raspberery Pi likes Open Source |
| 2. Cross-Compiling for Raspberry Pi |
| 3. Cross-Compiling ITK for Raspberry Pi |
| 4. Raspberry Pi likes VTK |
| 5. Raspberry Pi likes Node.js |
Following on our previous posts on using the Raspberry Pi,
here we describe the process of Cross-Compiling ITK for the Raspberry Pi.
 |
 |
- In our first post we described how to build ITK natively in the Raspberry Pi board,
and how the time that it takes to do so, makes it desirable to pursue cross-compilation. - In our second post, with the kind help of Andrew Maclean,
we described how to set up a cross-compilation environment with CMake. - Here we apply that same environment to cross-compile ITK in a
Dell Precision M6700 Laptop (Intel based) host running Ubuntu 12.10,
and with an ARM architecture as a target.
Note: as with the previous post, many of the images below may appear blurred due to subsampling. Please simply click on them, to see them in full resolution, where the text will be clearly readable.
Step 1. Set up the tool chain.
As described in the previous blog post
Step 2. Set up the tool chain CMake file
As described in the previous blog post
- We named this file: Toolchain-RaspberryPi.cmake
- and put it in the directory: /home/ibanez/bin/RaspberryPi/CMakeToolChain
Any other filename and any other directory would have worked as well.
This is specified here only to make easier to follow the steps below.
The file content is:
| # this one is important SET(CMAKE_SYSTEM_NAME Linux) #this one not so much SET(CMAKE_SYSTEM_VERSION 1) # specify the cross compiler SET(CMAKE_CXX_COMPILER # where is the target environment # search for programs in the build host directories |
Note that several entries are pointing to the tool chain, that is located in the directory:
/home/ibanez/local/x-tools/arm-unknown-linux-gnueabi
Step 3. Configure ITK in a binary directory
We now create a Binary directory where we will build ITK
- mkdir -p /home/ibanez/bin/RaspberryPi/ITK
- cd /home/ibanez/bin/RaspberryPi/ITK
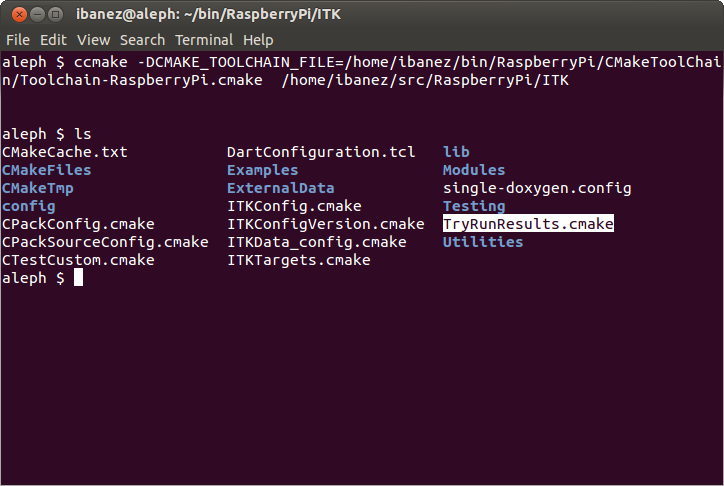
From there, we call ccmake, passing to it the location of the toolchain file, and the source tree of ITK.
ccmake -DCMAKE_TOOLCHAIN_FILE=/home/ibanez/bin/RaspberryPi/CMakeToolChain/Toolchain-RaspberryPi.cmake /home/ibanez/src/RaspberryPi/ITK
This triggers the configuration process, which starts by doing a set of TRY_COMPILEs and TRY_RUNs in order to evaluate the capabilities of the compiler. In this case, the compiler provided by the tool chain. Many of these won’t be successful, as shown in the image below:
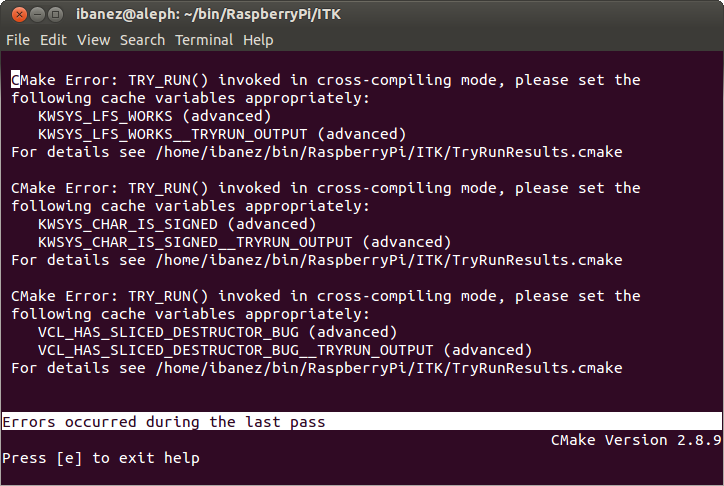
and therefore we must manually provide the answers to them.
But, before we get to that, let’s continue with the basic configuration.
Simply hit the “e” key and continue with the typical configuration.
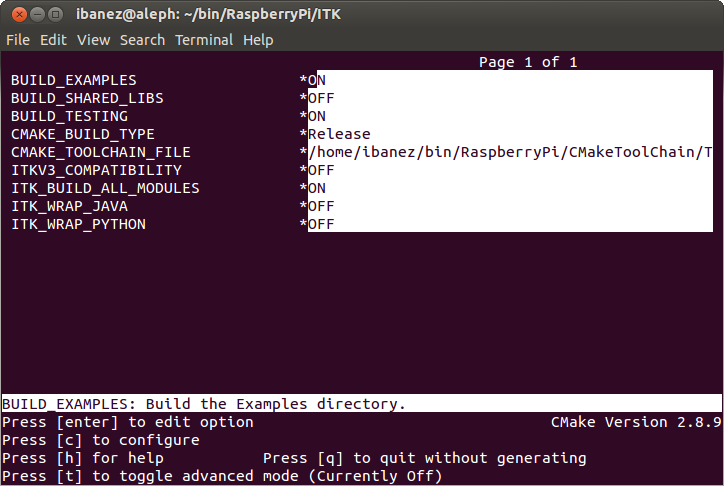
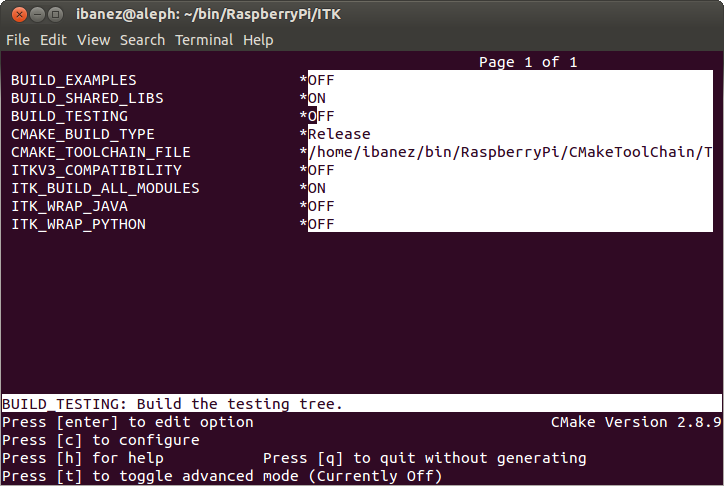
Since we are building the library for installation, we do
- Disable Examples
- Disable Testing
- Build for Release mode
and after hitting “c” to configure, we get the summary of the missing settings:
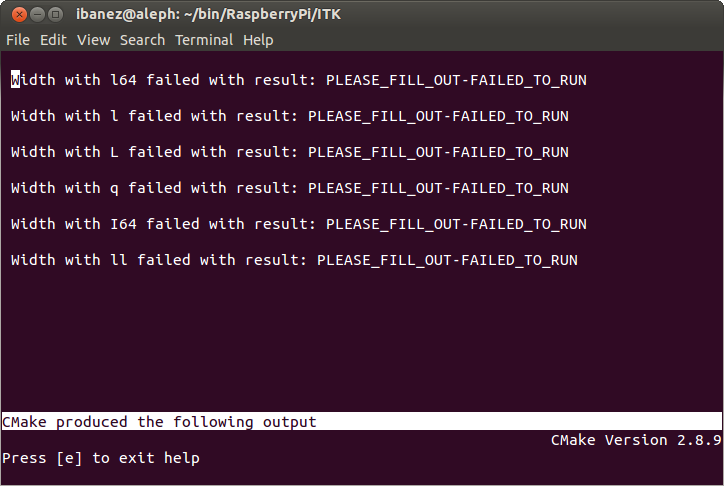
We do “e” to exit from the error messages screen, and “q” to quit ccmake.
Step 4. Complement the TRY_RUN file
To make our lives very easy, CMake leaves behind a file called
TryRunResults.cmake
where we can manually fill up the results of the TRY_RUNs.
To fill up this file, we need to go back to the Raspberry Pi, and capture the CMakeCache.txt file that we got when we natively configured ITK in the board.
Note that, this doesn’t mean that one has to fully build ITK in the board, before being able to cross-compile it in the host. It just means that we need to do a full CMake configuration pass natively in the board.
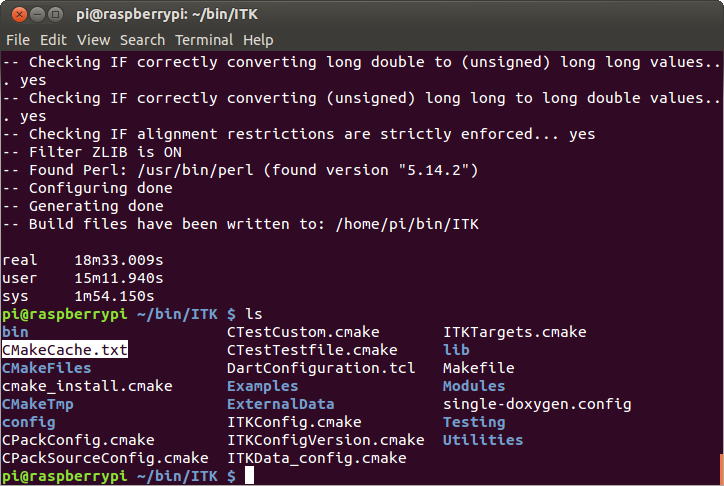
For completeness, here we show how to do that in the Raspberry Pi:
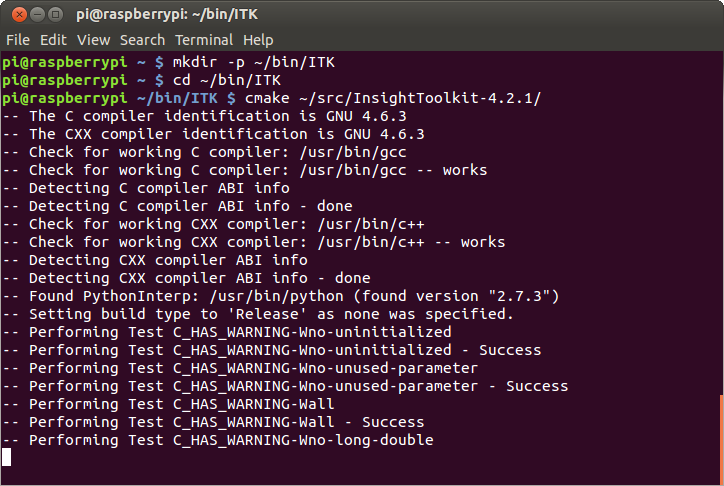
which after 19 minutes gives us a configured directory with a CMakeCache.txt file in it:
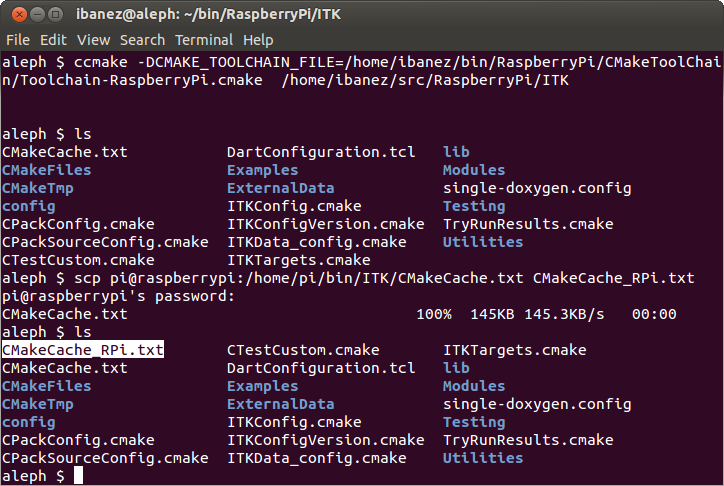
We copy this file to the host,
in order to copy some of the settings into our thirsty TryRunResults.cmake file.
We can now go item by item in the TryRunResults.cmake file, manually filling up the entries
that we couldn’t resolve by running the configuration with the toolchain.
For example, we start with the variable KWSYS_LFS_WORKS:
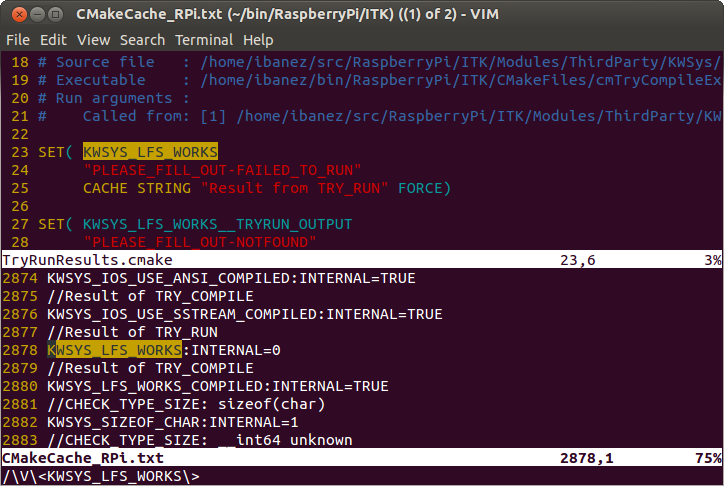
That is empty in the TryRunResults.cmake file, but was found to be assigned the value “0”
in the CMakeCache.txt file that we recovered from the Raspberry Pi native configuration.
We replace the value accordingly:
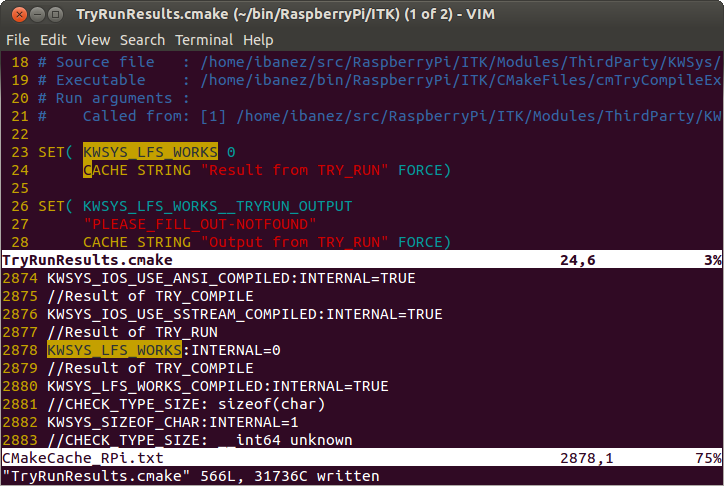
and we do the same with the following variables in the TryRunResults.cmake file.
The complete set of changes is
- < SET( KWSYS_LFS_WORKS 0
- < SET( KWSYS_CHAR_IS_SIGNED 1
- < SET( VCL_HAS_SLICED_DESTRUCTOR_BUG 1
- < SET( VCL_HAS_WORKING_STRINGSTREAM 1
- < SET( VCL_HAS_LFS 1
- < SET( VCL_COMPLEX_POW_WORKS 1
- < SET( VCL_CHAR_IS_SIGNED 0
- < SET( VCL_NUMERIC_LIMITS_HAS_INFINITY 1
- < SET( VCL_PROCESSOR_HAS_INFINITY 1
- < SET( QNANHIBIT_VALUE 1
- < SET( HDF5_PRINTF_LL_TEST_RUN 0
- < SET( H5_LDOUBLE_TO_INTEGER_WORKS_RUN 0
- < SET( H5_ULONG_TO_FLOAT_ACCURATE_RUN 0
- < SET( H5_ULONG_TO_FP_BOTTOM_BIT_ACCURATE_RUN 1
- < SET( H5_FP_TO_ULLONG_ACCURATE_RUN 0
- < SET( H5_FP_TO_ULLONG_RIGHT_MAXIMUM_RUN 0
- < SET( H5_LDOUBLE_TO_UINT_ACCURATE_RUN 0
- < SET( H5_ULLONG_TO_LDOUBLE_PRECISION_RUN 1
- < SET( H5_FP_TO_INTEGER_OVERFLOW_WORKS_RUN 0
- < SET( H5_LDOUBLE_TO_LLONG_ACCURATE_RUN 0
- < SET( H5_LLONG_TO_LDOUBLE_CORRECT_RUN 0
- < SET( H5_NO_ALIGNMENT_RESTRICTIONS_RUN 0
and the resulting TryRunResults.cmake file is attached at the bottom of this blog post.
You want to make a copy of this file in another directory, just in case it is lost in the subsequent steps.
This is because the file is regenerated when we run CMake.
Step 5. Reconfigure using the TRY_RUN file
Now that we have all the missing try runs in the TryRunResults.cmake file, we copied it in another directory and pass it as input to the cmake configuration as
- cd ~/bin/RaspberryPi/ITK
- cmake -C ~/Uploads/TryRunResults.cmake -DCMAKE_TOOLCHAIN_FILE=/home/ibanez/bin/RaspberryPi/CMakeToolChain/Toolchain-RaspberryPi.cmake /home/ibanez/src/RaspberryPi/ITK
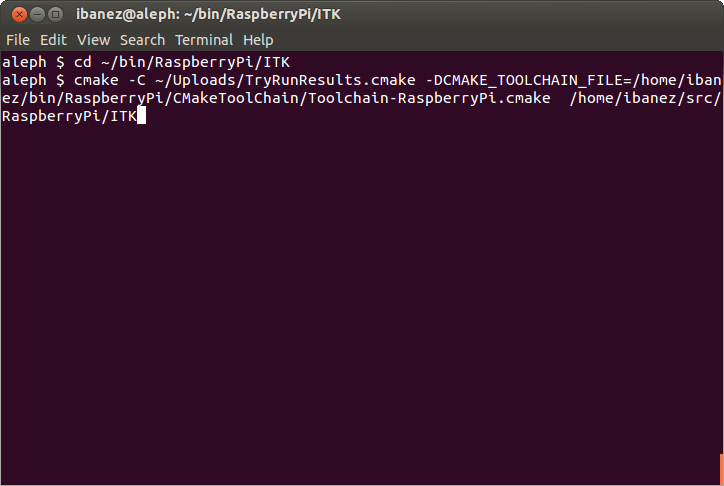
and in about 5 seconds we get:

Step 6. Build Build Build !!!
Now we launch make and ask for an optimistic use of all the cores:
- make -j10 -i
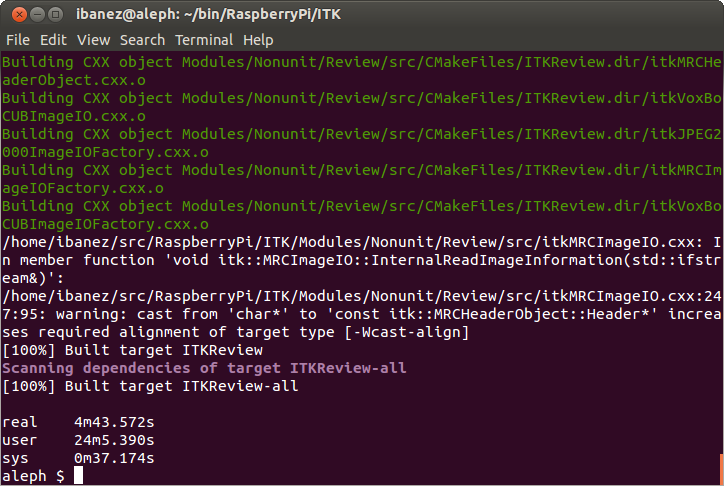
which is always a joy to watch:

Note that we also added “-i” to ignore some compilation errors, since we know that we have
a pending issue with the TIFF library, and a decision that was made by the TIFF development
team in a time when memory was more expensive than computation power… (more on this later).
This build finishes in about 5 minutes:
and now we deal with the compilation errors.
Step 7. We Meet Again, TIFF Library !
If we do “make”, we can see that the remaining problem is in the TIFF library
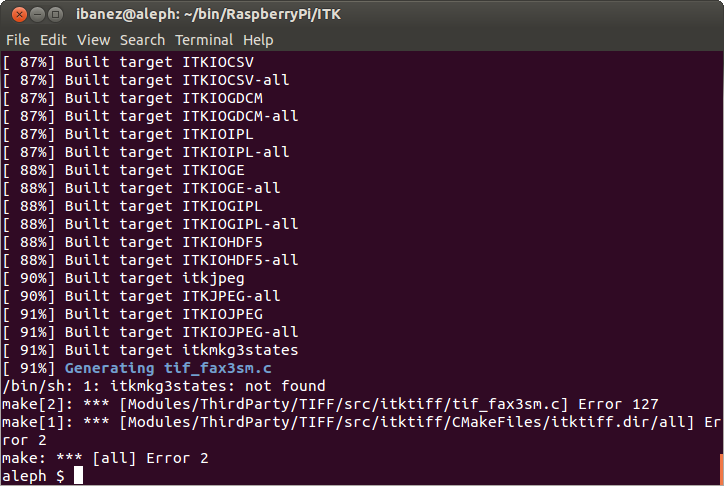
Where, years ago the development team choose to generate a table file at build time.
This table file represents a set of state and transitions used when reading and writing
images in FAX format. The table is written in a generated file that will be named
- tif_fax2sm.c
This table file is built by an executable called “mkg3states“, here renamed “itkmkg3states“,
because an executable name is not cool enough if it doesn’t start with “itk“. (well…actually,
more to avoid confusion with other TIFF installations that may be around in your system).
Using the verbose option of make we can see what is going on:
- make VERBOSE=1
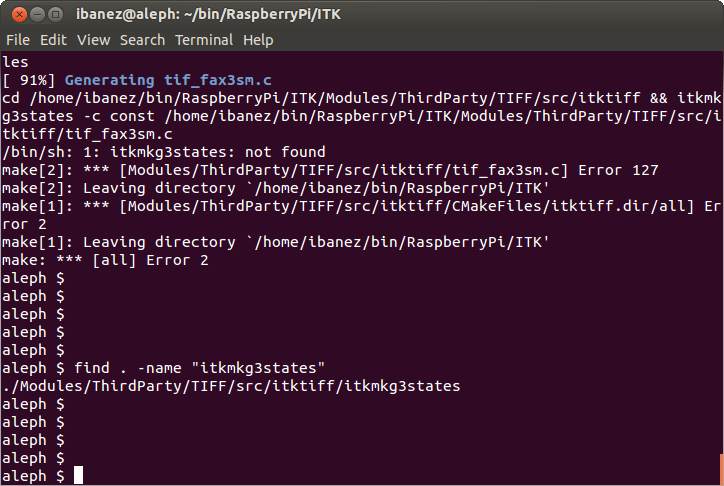
CMake did indeed built the “itkmkg3states” executable, but… it is built for the
ARM architecture and therefore it can’t be executed in our Intel-based machine.
The solution: We locate an Intel-based natively built “itkmkg3states” executable in one
of our own ITK builds in this host, and copy it on the location where the ARM-based build
is now, and then we manually execute the command that will generate the tif_fax2sm.c file:
- cd /home/ibanez/bin/RaspberryPi/ITK/Modules/ThirdParty/TIFF/src/itktiff
- cp /home/ibanez/bin/ITK/Release/Modules/ThirdParty/TIFF/src/itktiff/itkmkg3states .
- ./itkmkg3states -c const /home/ibanez/bin/RaspberryPi/ITK/Modules/ThirdParty/TIFF/src/itktiff/tif_fax3sm.c
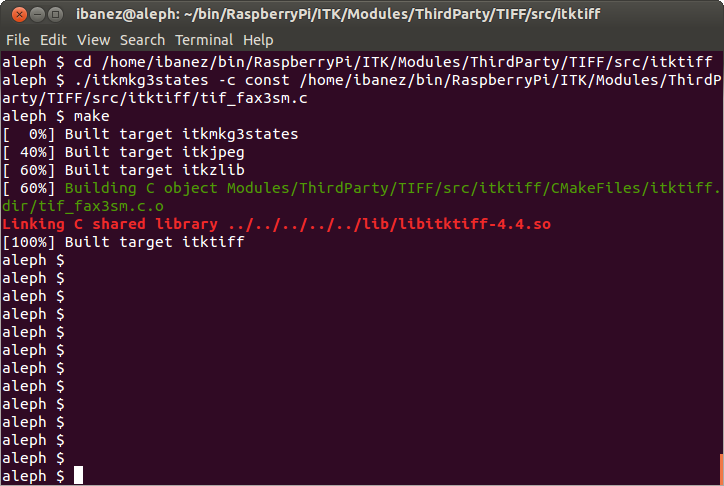
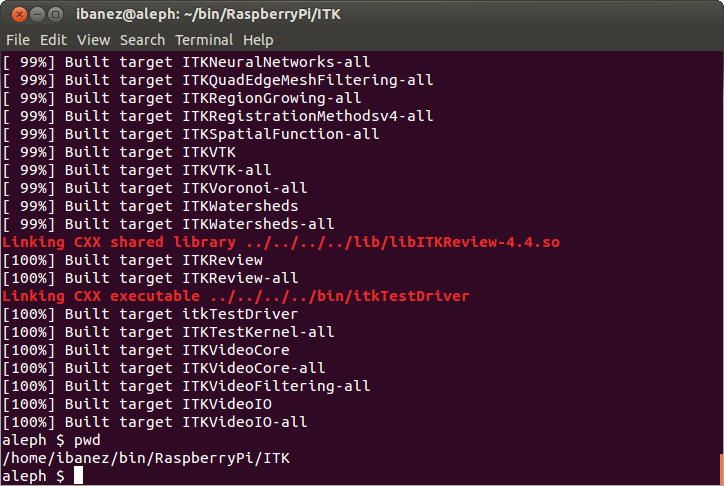
Now that we have finished building the TIFF library, we can go back to the top of the
ITK binary directory and do a final “make”
This step is a bit of too much trouble for a file of 78Kb in size…
In retrospective, it would have been a lot simpler to include the generated file
in the source code repository instead of generating it at run time.
The bitterness in the tone is because this little idiosyncratic detail of the TIFF library also
came across our way when cross-compiling ITK to run in the IBM Blue Gene Supercomputer
and when cross-compiling it for Macs to be interfaced with ImageJ.
Step 8. Pack and Go to Raspberry Pi
Our build of ITK was configured to be installed in “/usr/local” in the target machine,
but we still have the flexibility of installing it in another location.
Now we need to
- Package it,
- copy it to the Raspberry Pi,
- and install it in its final destination directory.
To do this, we take advantage of the packaging capabilities of CMake provided by CPack.
We simply go to the top of the ITK binary directory and type
- make package

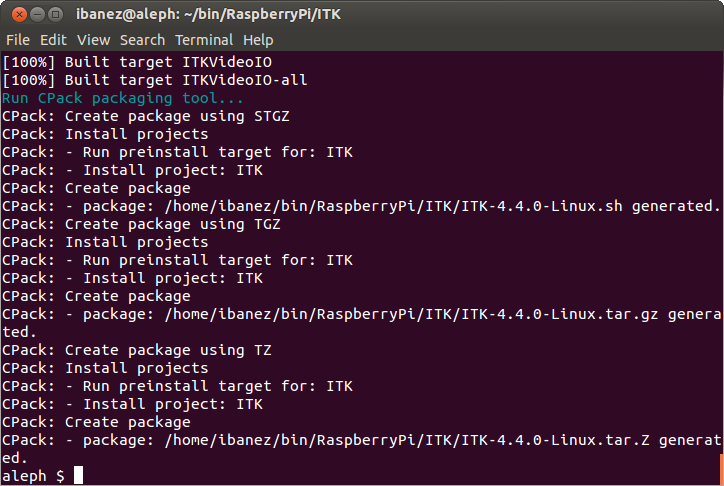
This generates three targets:
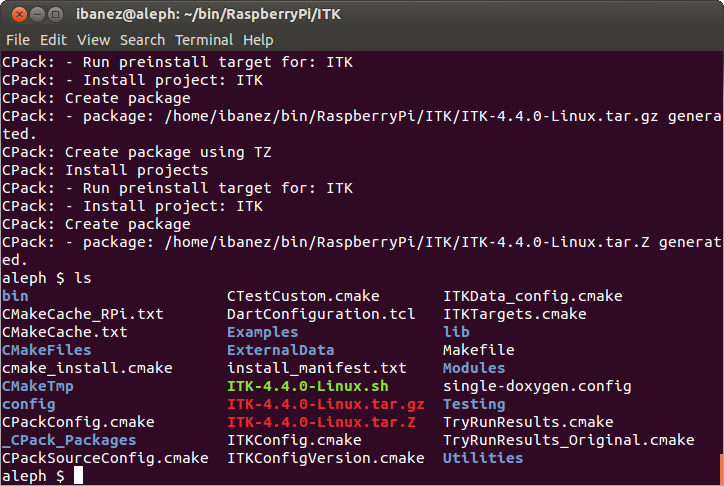
- ITK-4.4.0-Linux.sh
- ITK-4.4.0-Linux.tar.gz
- ITK-4.4.0-Linux.tar.Z
Where the .sh is a shell installer, and the tar files are full self-contained trees.
Each one of these files are independent and self-sufficient.
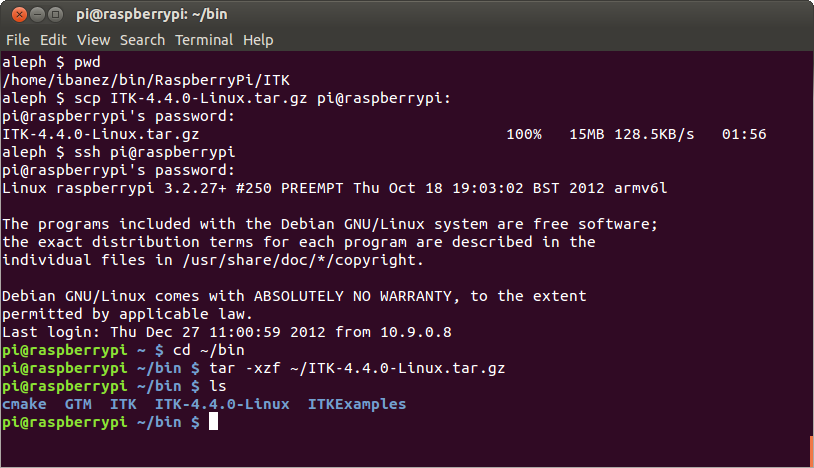
We can, for example, take the ITK-4.4.0-Linux.tar.gz file, copy it to the Raspberry Pi,
and expand it to have our local ITK installation:
Step 9. Test with a Hello World
Then we can test it by building natively in the Raspberry Pi
a Hello World that uses this ITK installation
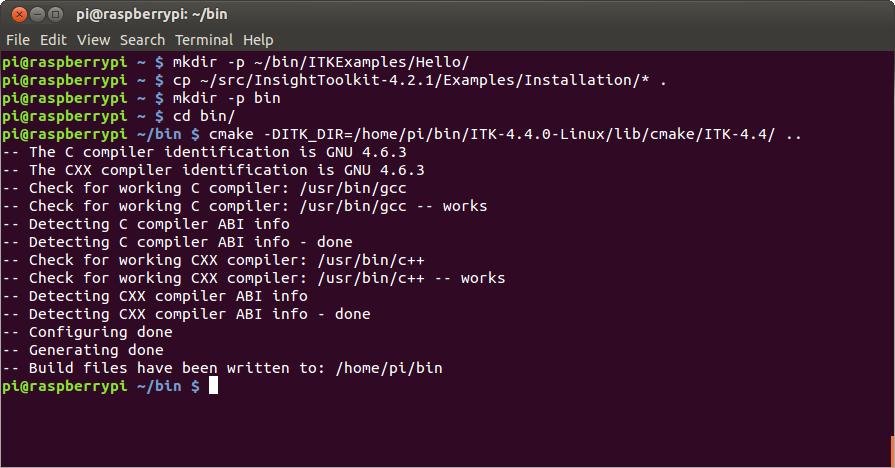
Note that we could have also cross compiled this example in the host machine.
With the following commands in the host:
- make -p ~/bin/RaspberryPi/ITKExamples/Hello
- cd ~/bin/RaspberryPi/ITKExamples/Hello
- cp ~/src/ITK/Examples/Installation/* .
- mkdir bin
- cd bin
- cmake -C ~/Uploads/TryRunResults.cmake -DCMAKE_TOOLCHAIN_FILE=/home/ibanez/bin/RaspberryPi/CMakeToolChain/Toolchain-RaspberryPi.cmake -DITK_DIR=/home/ibanez/bin/RaspberryPi/ITK ..
- make
and then copy the resulting executable to the Raspberry Pi target.
Note that in the CMake configuration above we used four command line arguments
- -C ~/Uploads/TryRunResults.cmake
- -DCMAKE_TOOLCHAIN_FILE=/home/ibanez/bin/RaspberryPi/CMakeToolChain/Toolchain-RaspberryPi.cmake
- -DITK_DIR=/home/ibanez/bin/RaspberryPi/ITK
- ..
They are respectively:
- The first one points to the Try Run results file that we prepared with the Raspberry Pi configuration.
- The second one is the reference to the toolchain file
- The third one points ITK_DIR to the local cross build of ITK
- The fourth one points to the directory where the Hello World sources are (in this case the parent directory).
This concludes our tour of the process of Cross-compiling ITK for the Raspberry Pi.
Happy Hacking !
On a final note:
When compiling for the Raspberry Pi, most of the work goes into cross compiling for an ARM Architecture, as selected while we built the compilation toolchain. This means, that the process we have outlined here is not really limited to the Raspberry Pi, but goes to the wider set of devices based on ARM processors, that could be running various versions of Linux.
Among the list of ARM-based devices we can mention:
- Samsung Galaxy phones
- iPhone
- iPod
- iPad
- Kindle
- Google Nexus Tablets
- ASUS Transformer Tablets
- Motorola Xoom
- Many of the Nokia smart phones
- Game Boy
- Lego NXT
- Nintendo DS
- Garmin Navigation devices
- TomTom Navigation devices
Since many of these devices run the Android operating system which is Linux-based, or directly run a Linux installation, there are interesting opportunities to port applications to a wide range of portable devices that take advantage of the ARM processor low-power consumption features.