DIY Microscopy: Water Drop + iPad

The first observations of bacteria were made by Antony van Leeuwenhoek, and were reported in a letter he wrote to the Royal Society on September 17, 1683…
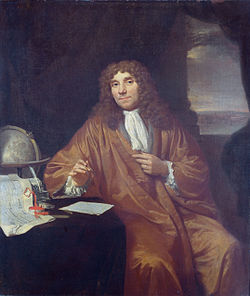
It has been said that some of his initial observations were made using a drop of water as a magnifying lens…
This sounds like a far-fetched story until one thinks about the ease with which a small drop of water can be produced, compared to the difficulty of making a glass lens of the same size. The magnifying power of a lens is inversely proportional to the radius of curvature of its surface. Therefore, the smaller the radius of the water drop, the higher its optical magnification will be. Careful observation after a rainy day will persuade us that the water drop can actually be used as a powerful single-lens microscope.

There is of course, the practical challenge of holding that small drop of water very close in front of your eye, and putting the sample to be observed on the other side. Luckily for us today, by mixing very old and very new technology, we can get the best of both worlds and verify some of Leeuwenhoek’s observations.
Here is what you need:
- A cup of water
- A cotton swab
- An iPad (or any other tablet-like device with a front-facing camera)
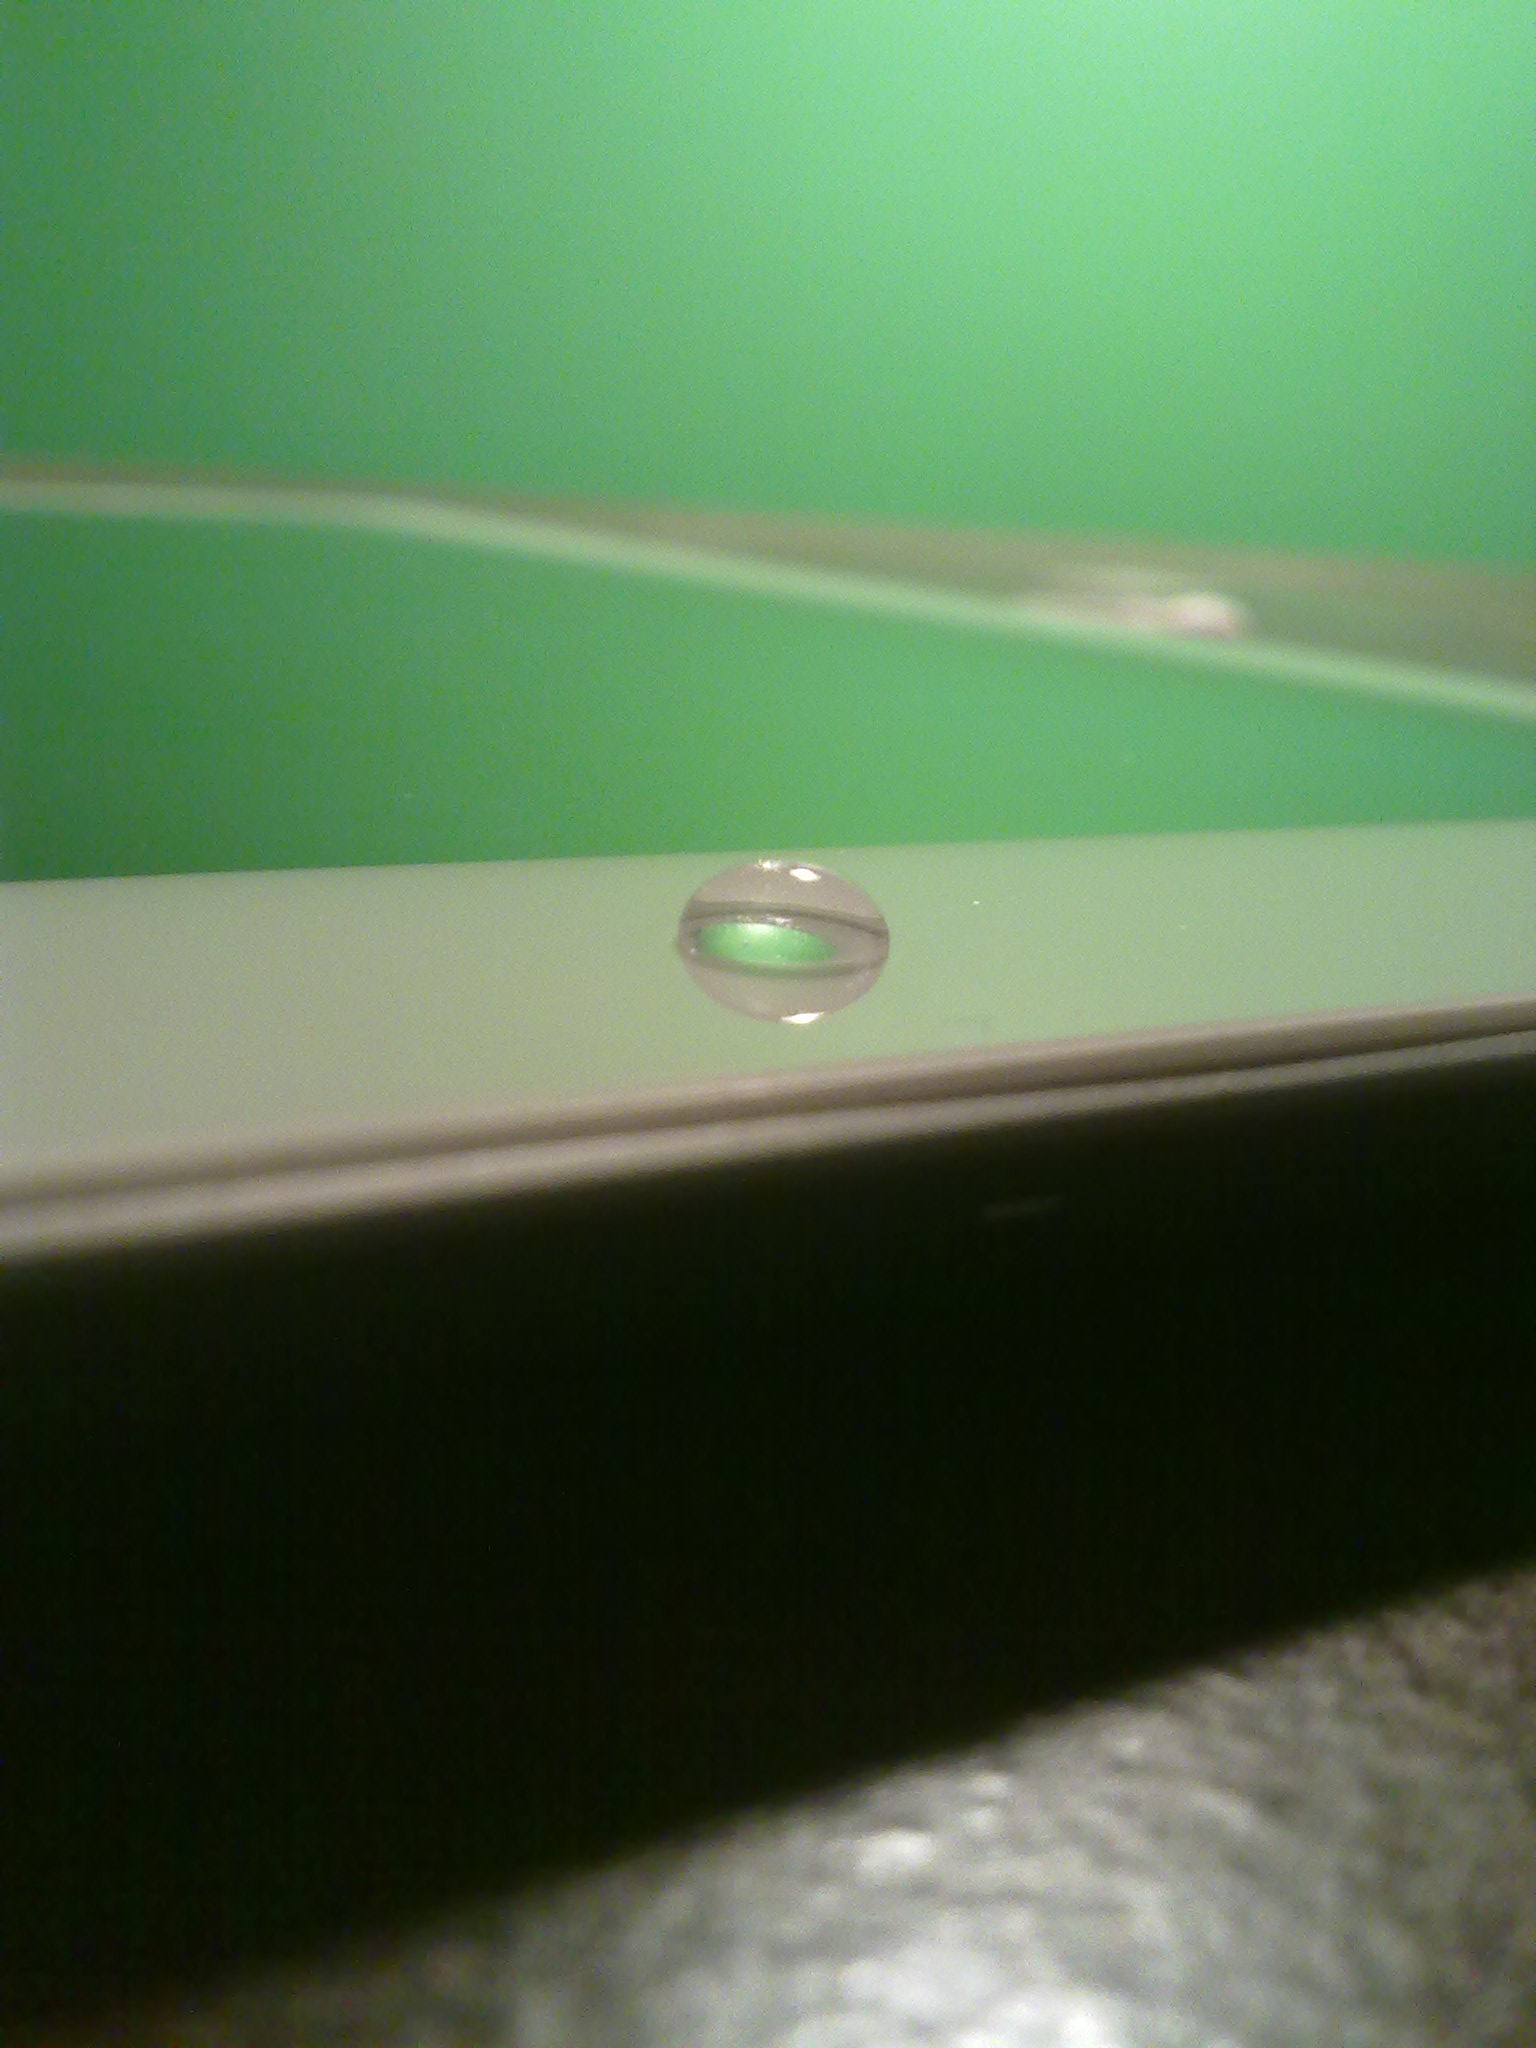
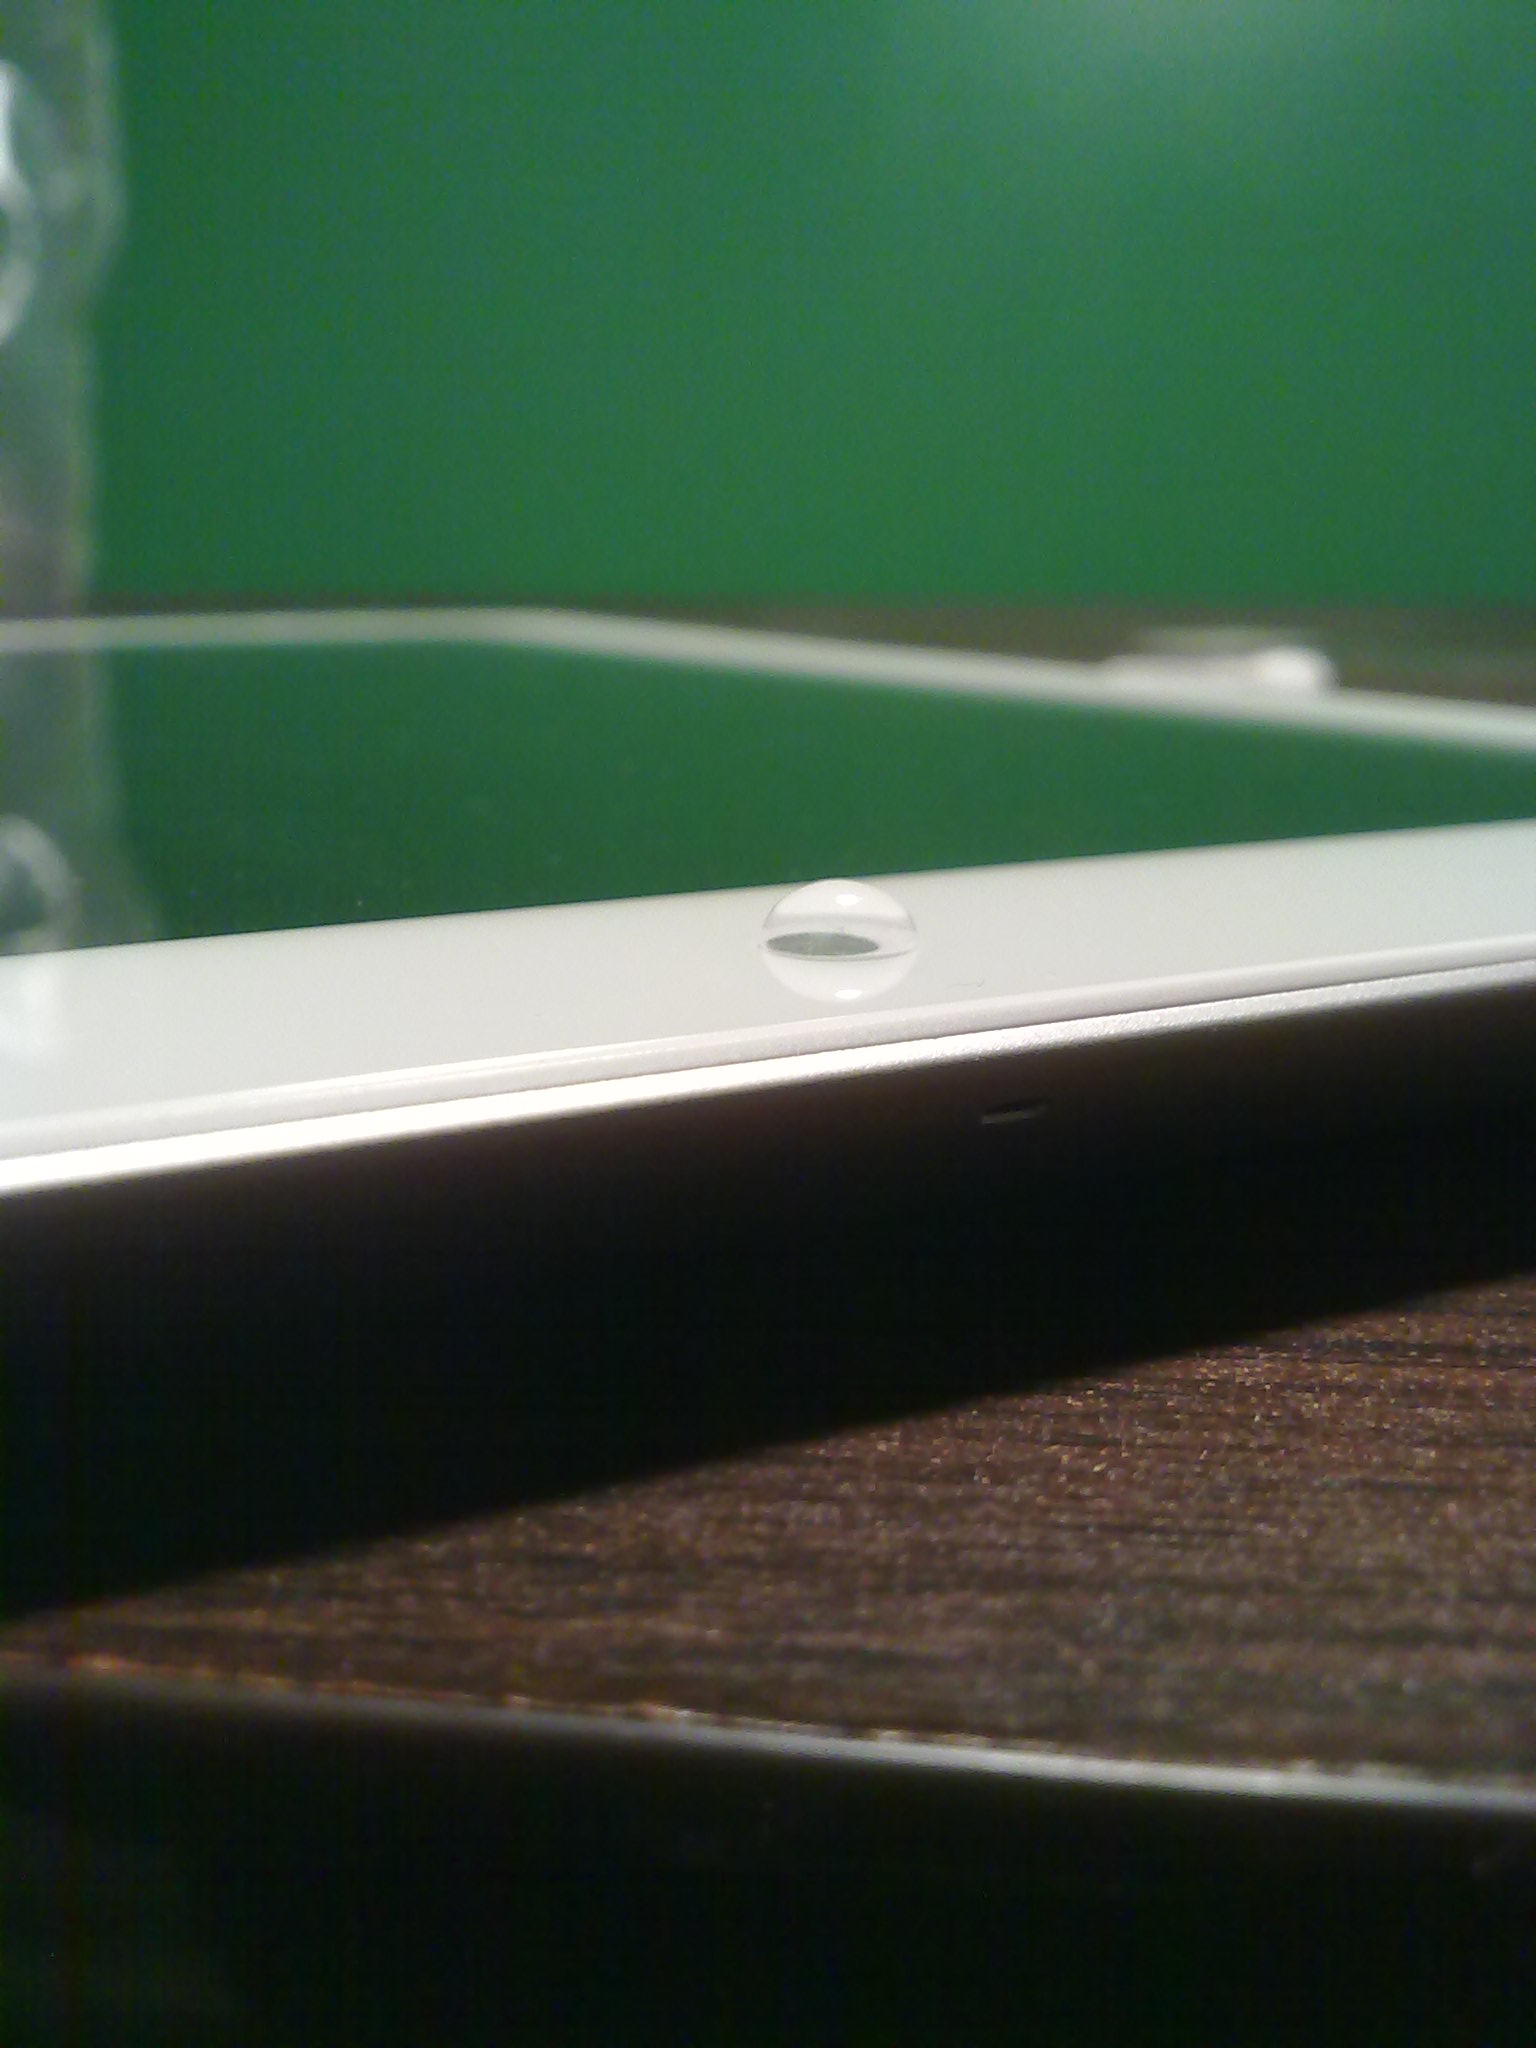
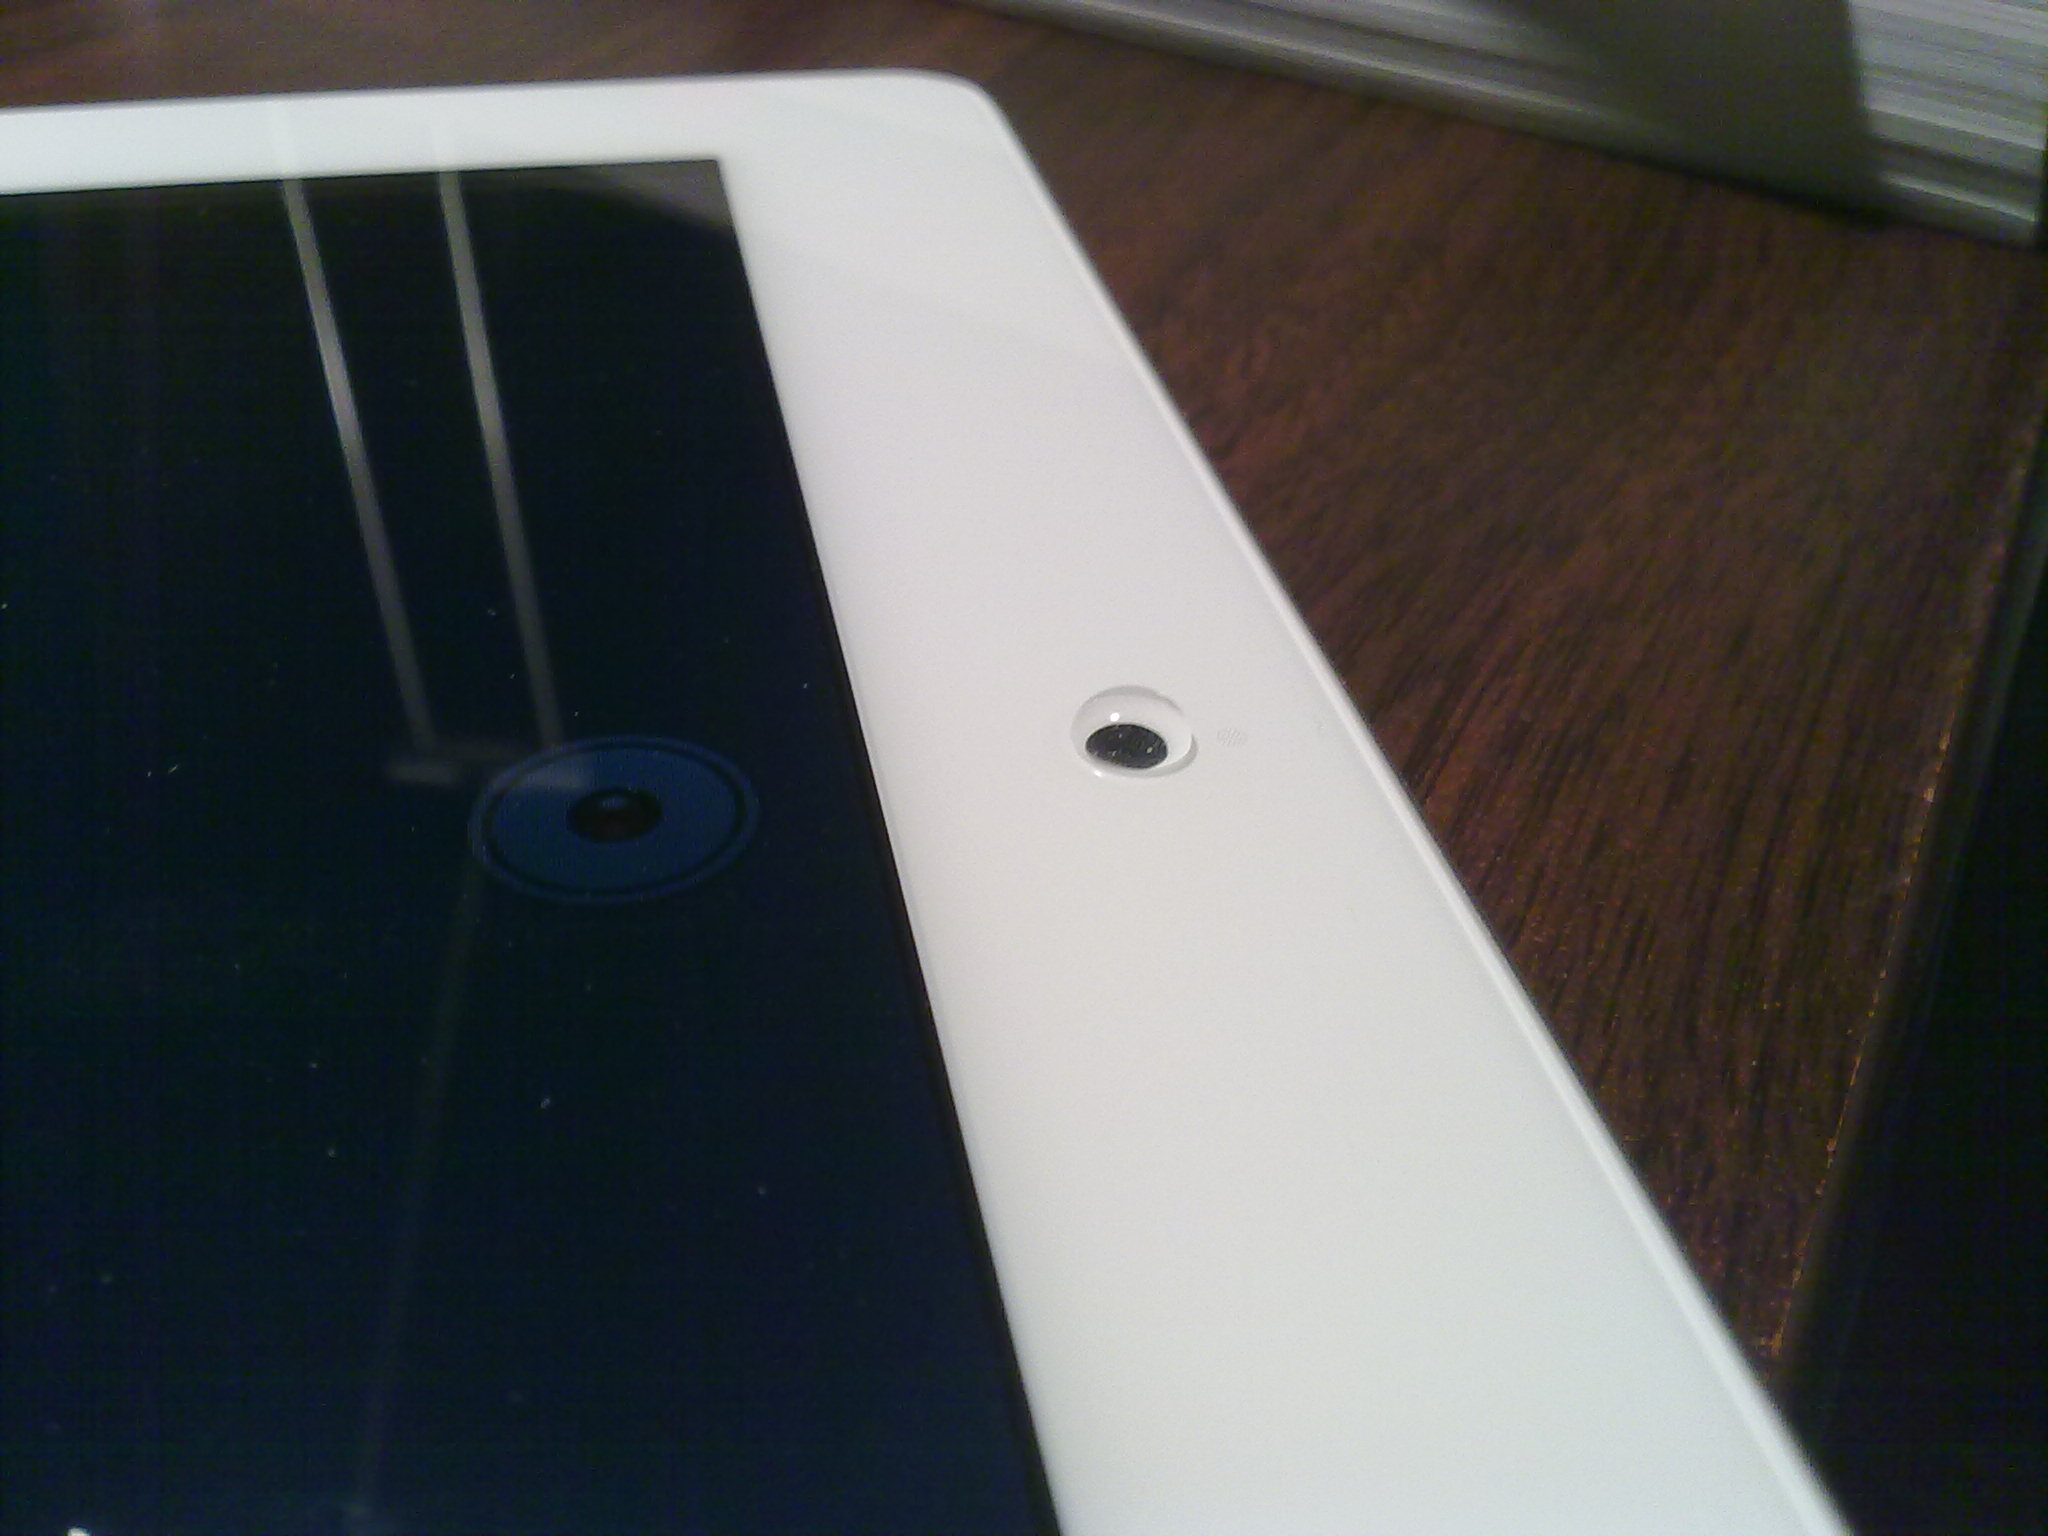
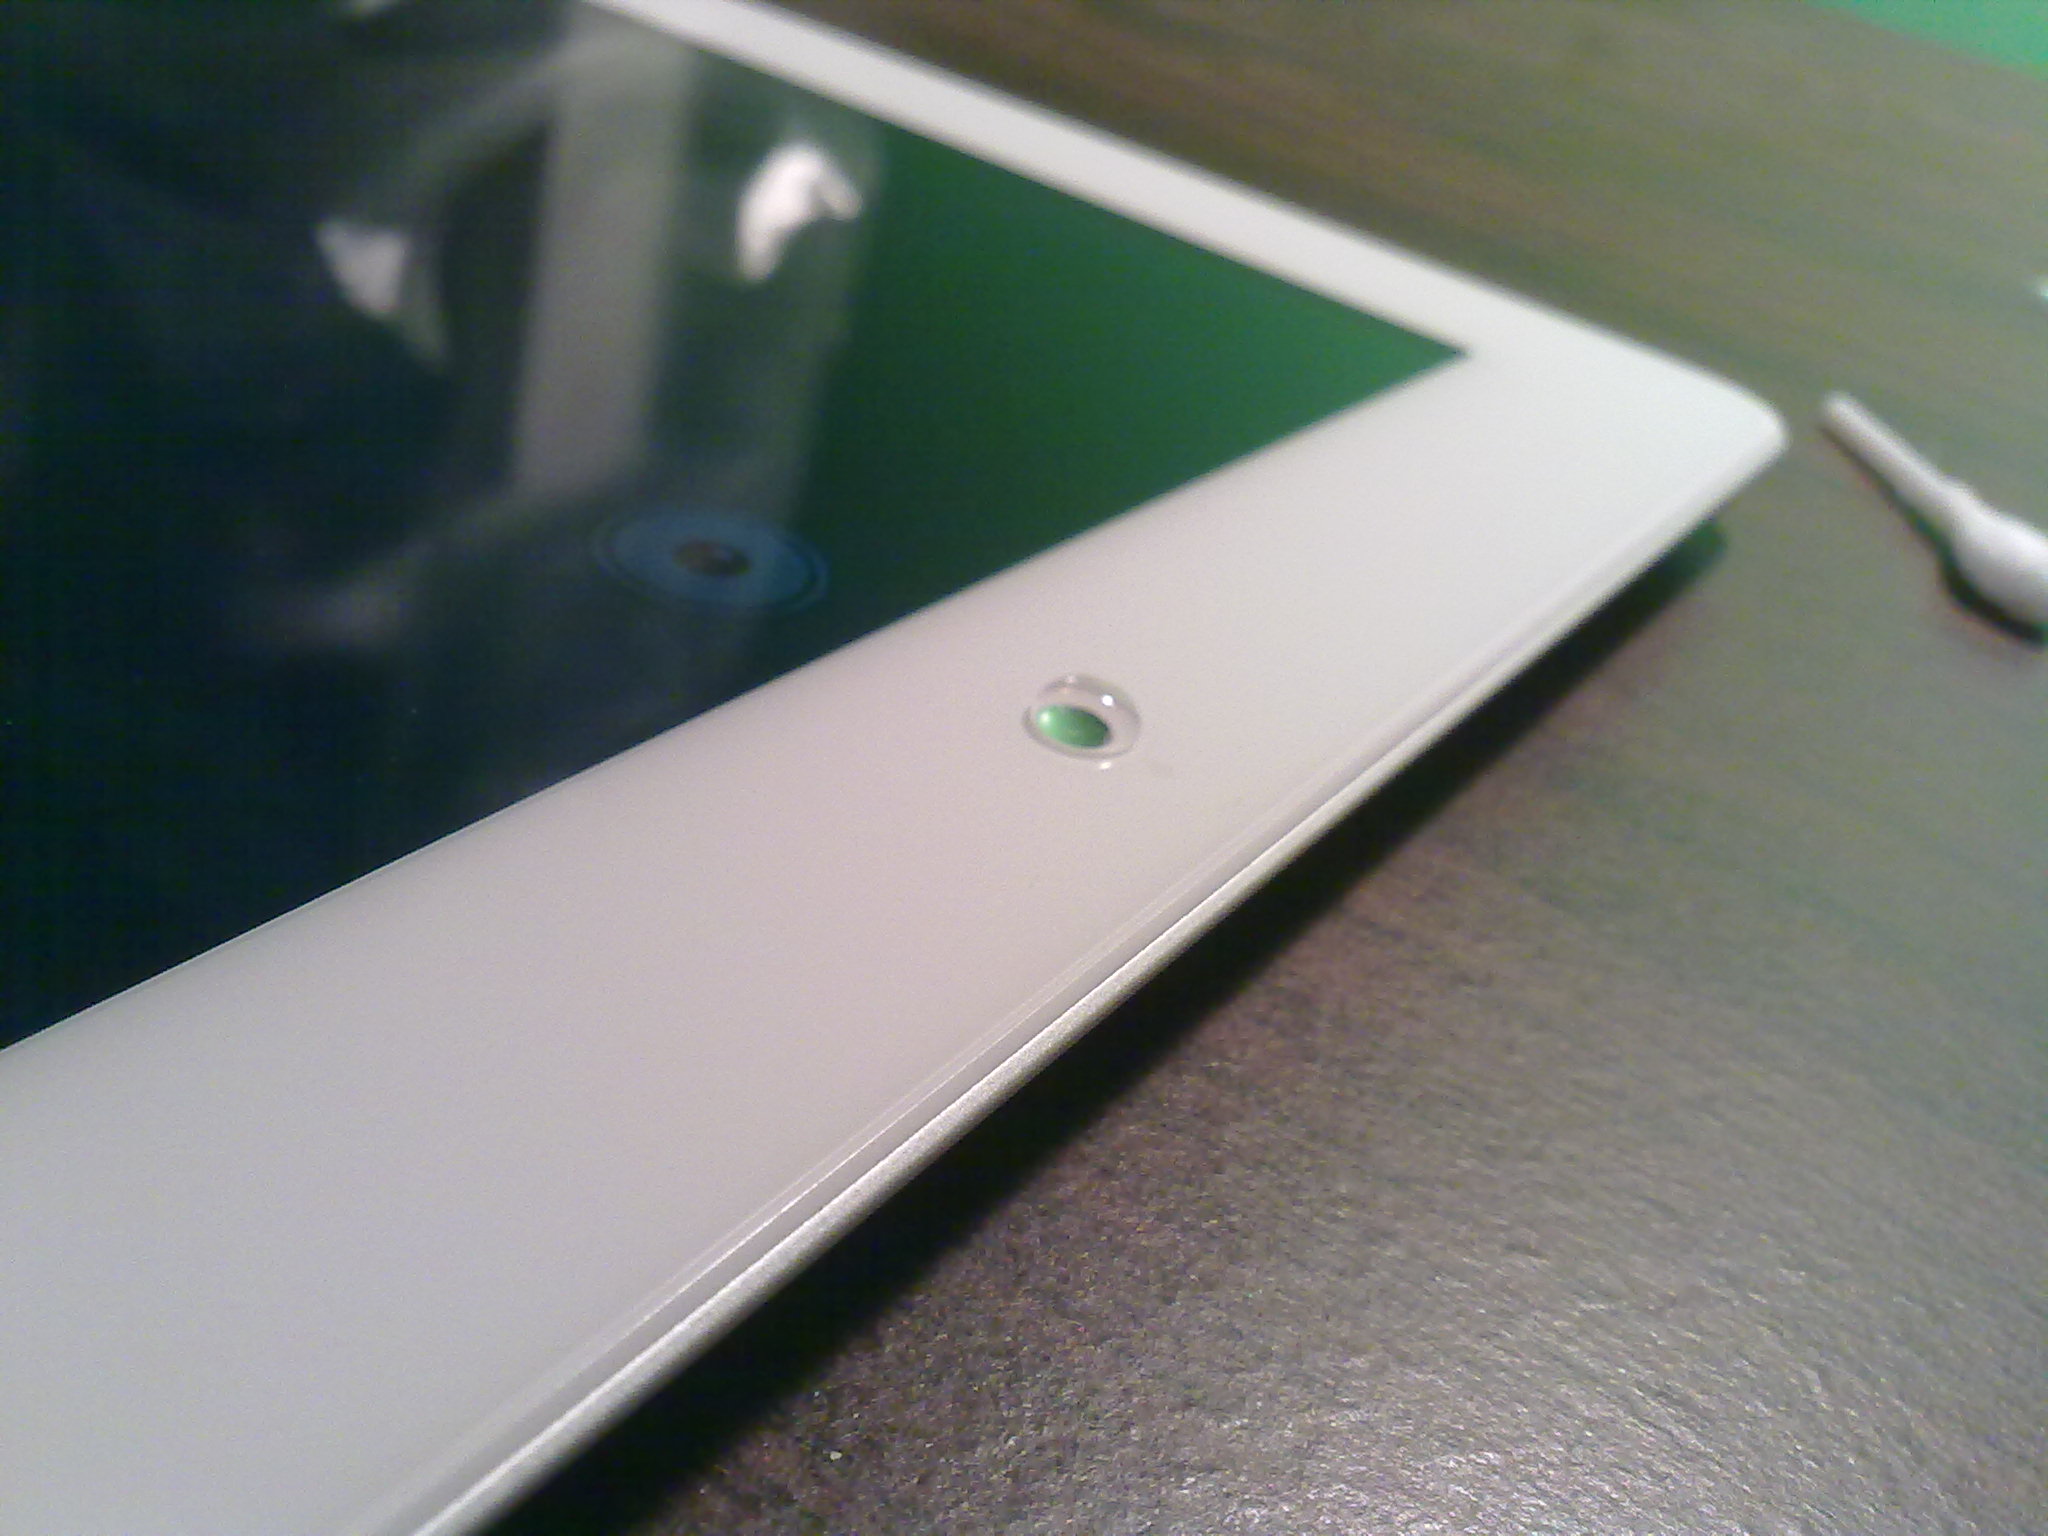
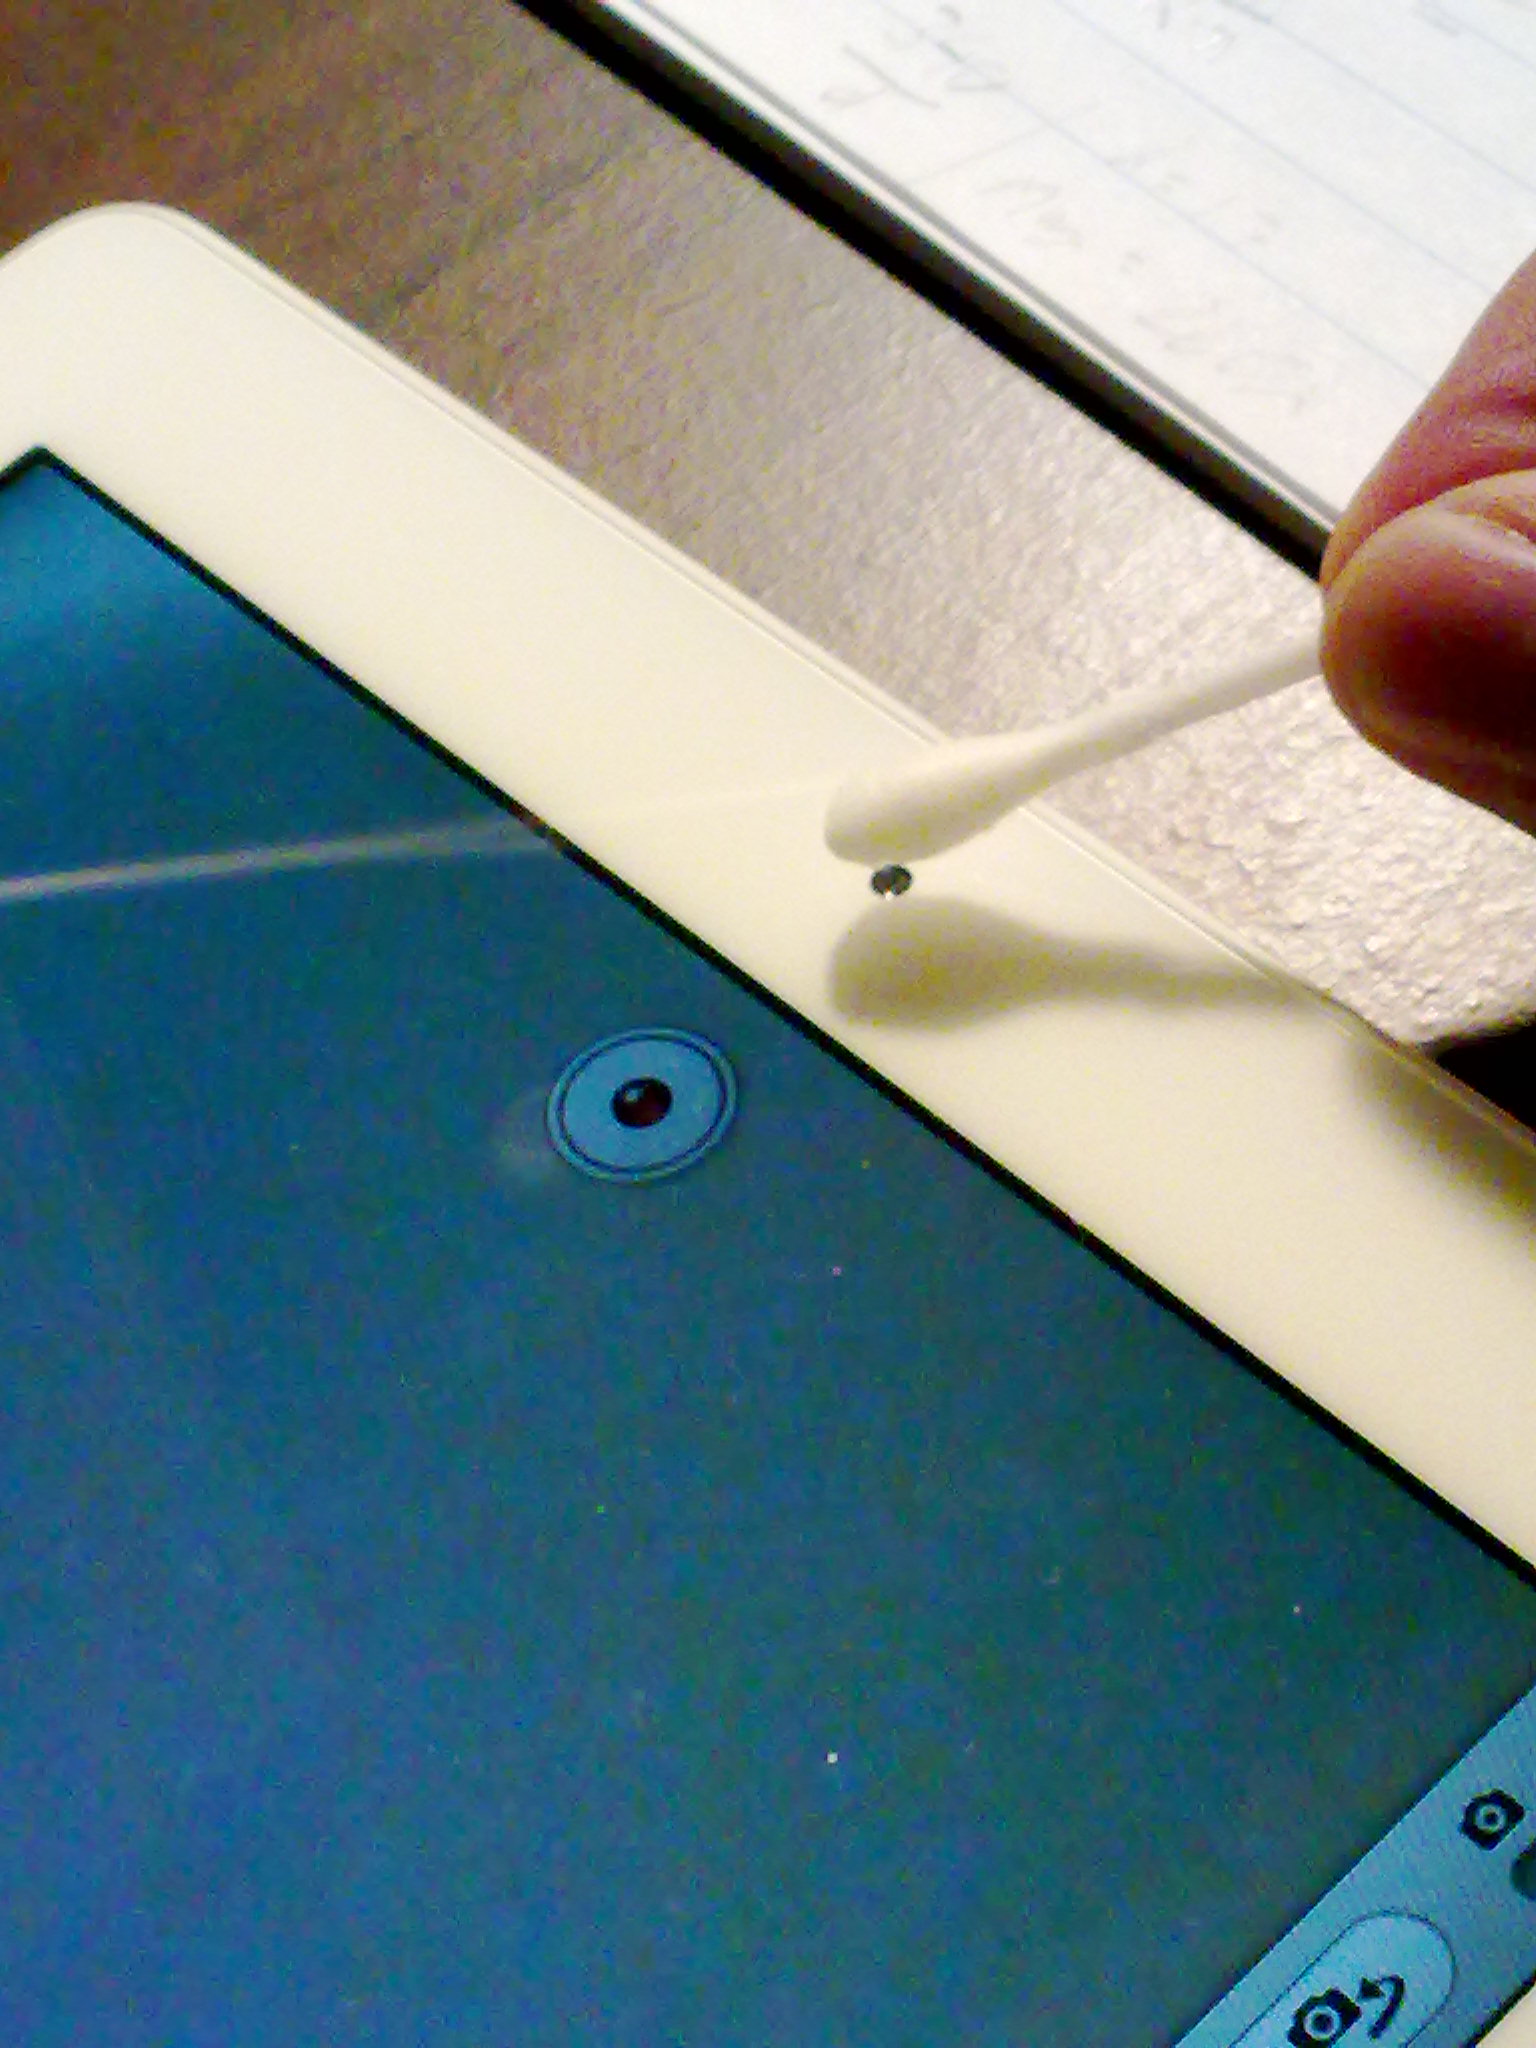
The iPad 2 has a front camera that is protected by the same cover glass that extends through the rest of the front surface. This is great for us, because we can simply:
- Place the iPad on a flat surface
- Immerse the cotton swab in the cup of water
- Squeeze the cotton swab head on top of the iPad camera until a drop of water falls on top of the camera
This may require several tries, since you want to get:- The smallest possible drop
- The drop centered on top of the camera lens
The result would look similar to the images below:
Once you have placed the drop, turn on the camera app and select to use the front camera.
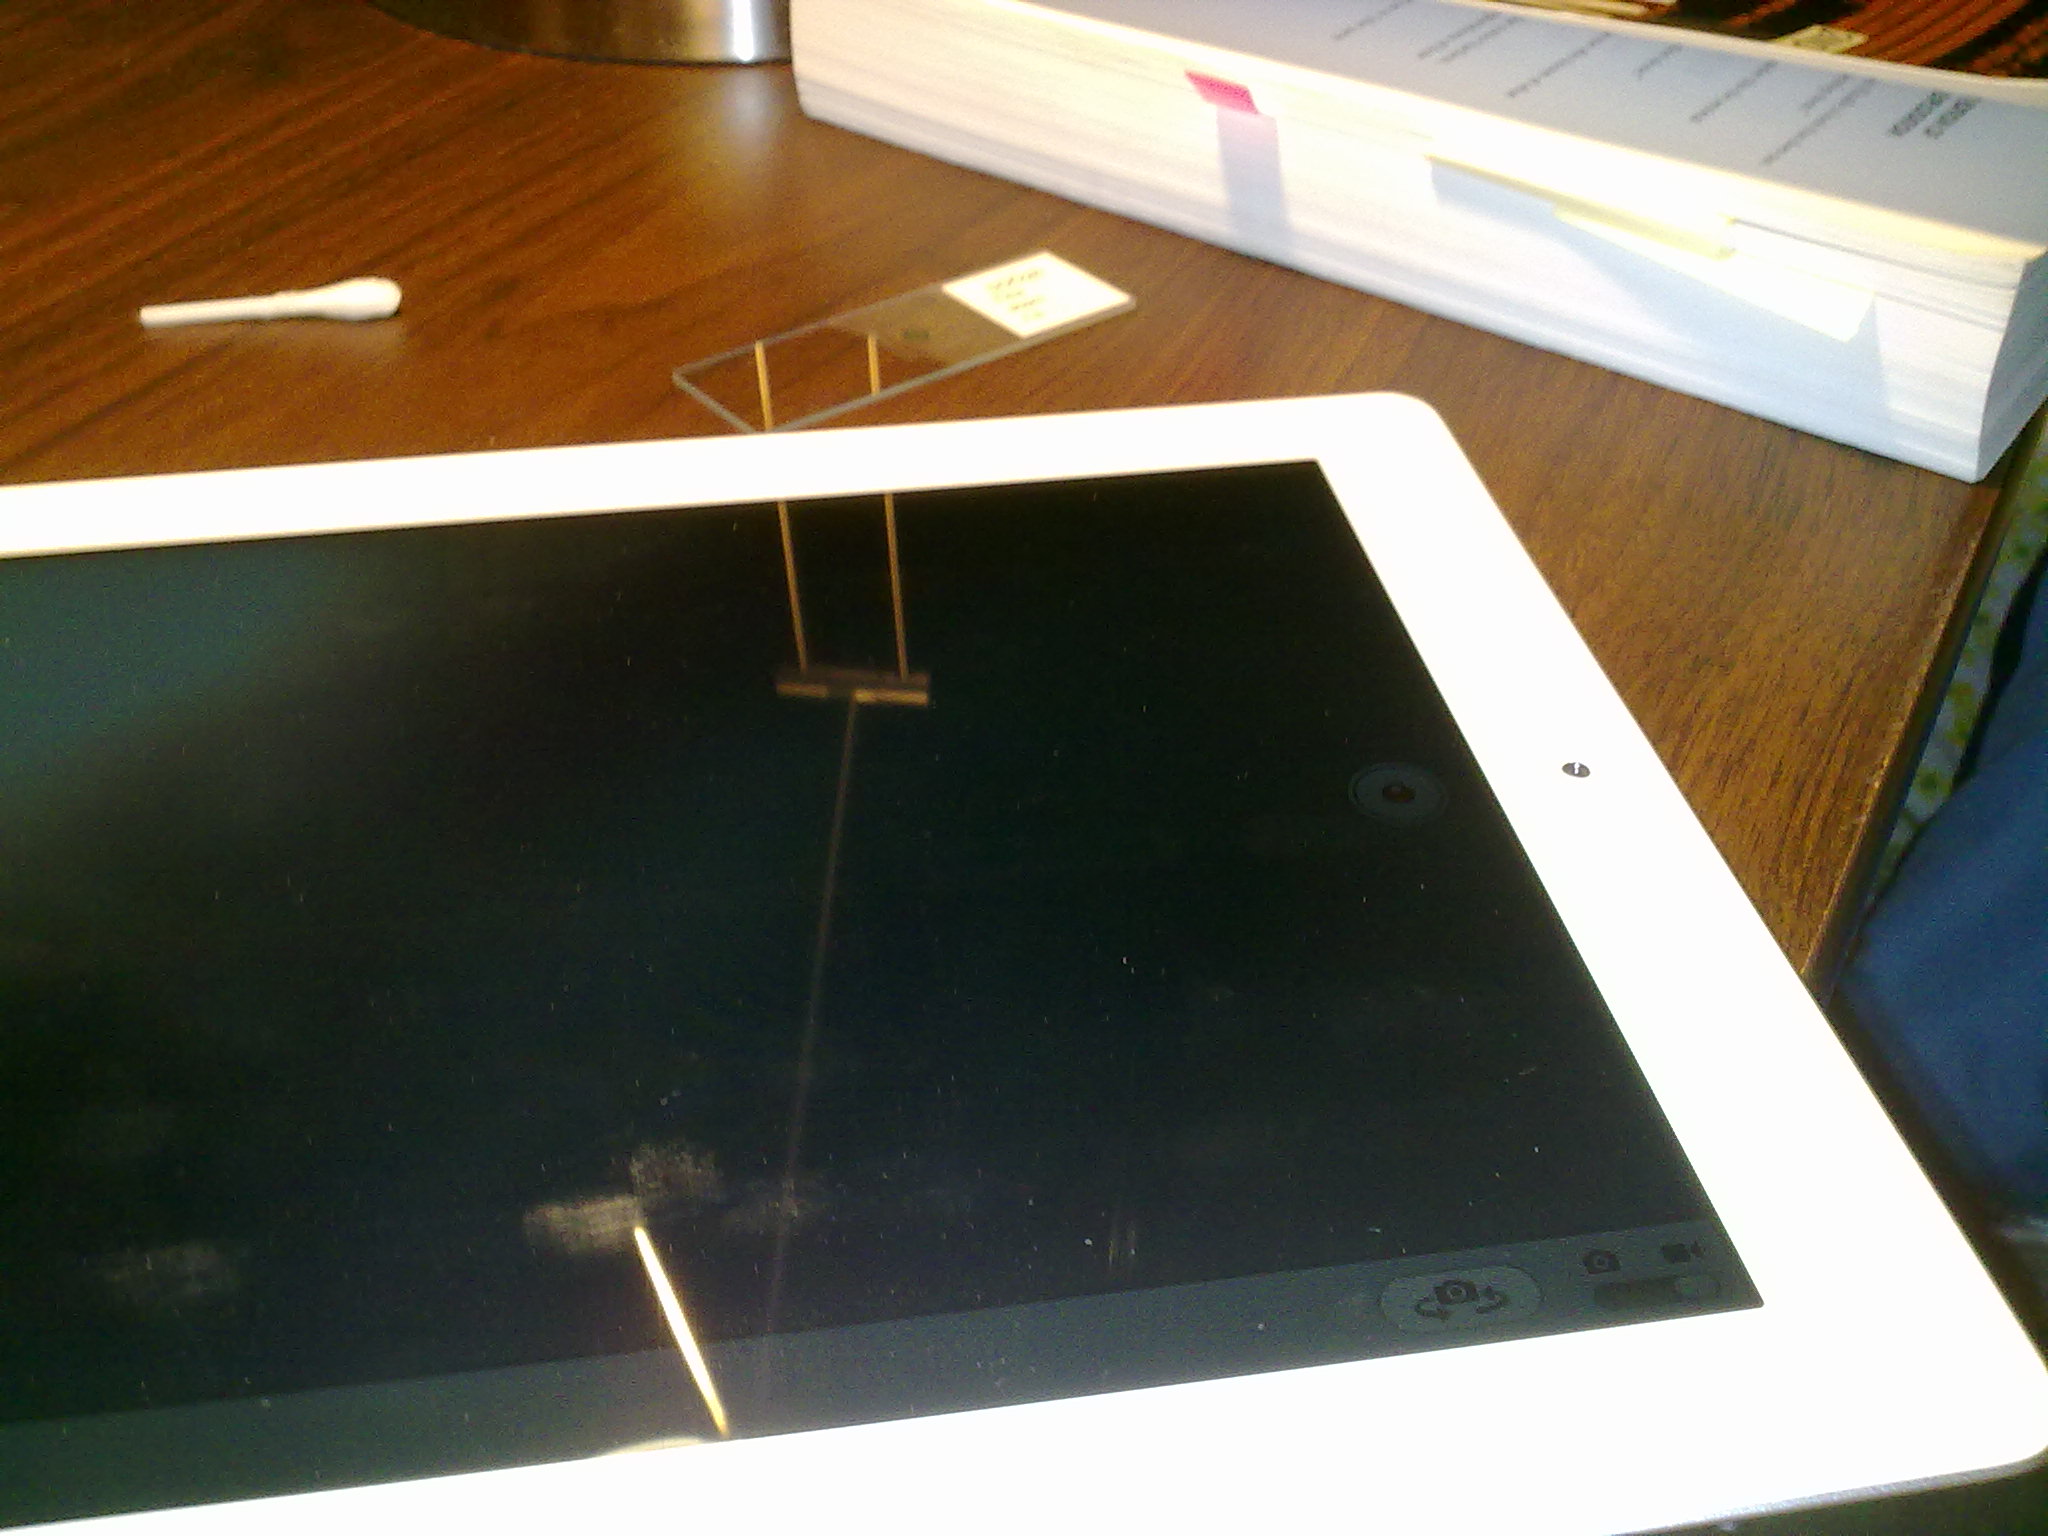
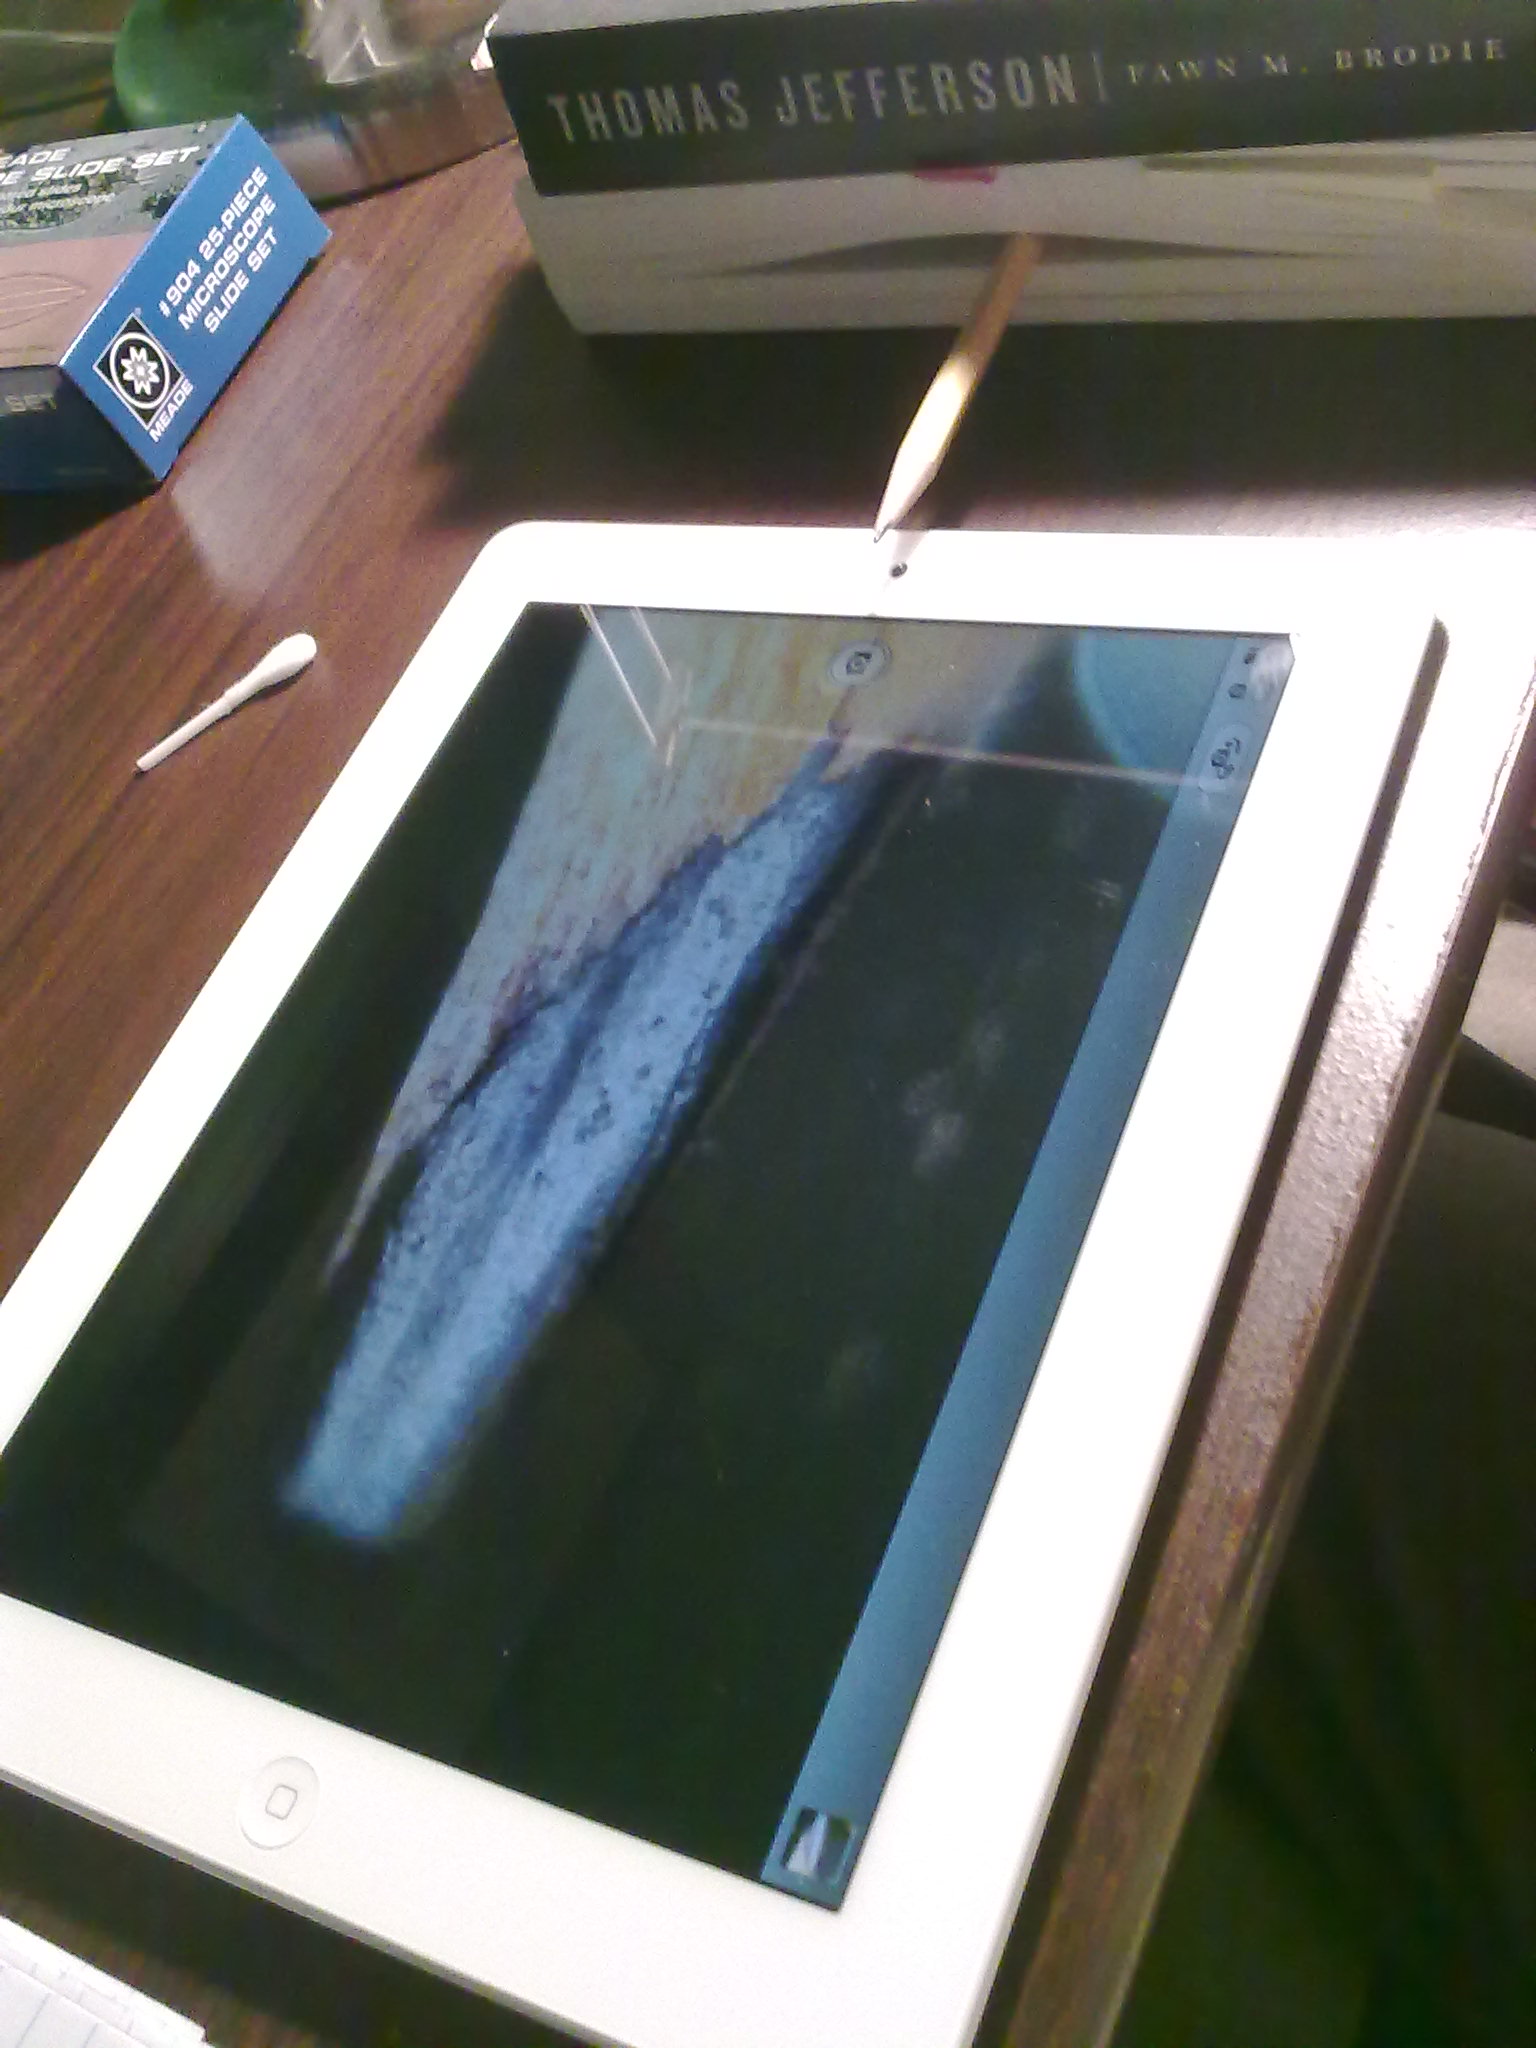
By placing a thick book beside the iPad, we get a stable platform in which we can insert samples to hold them in front of the camera. By moving the sample to different pages in the book, we get a high-precision sample holder. The book that we used here is 35mm thick and has 600 pages, which gives us a resolution of 0.05mm (50 microns) on the height at which to place the sample above the water drop lens. This precision turns out to be very important because the focal length of the water drop is about 1.5X the radius of the drop.
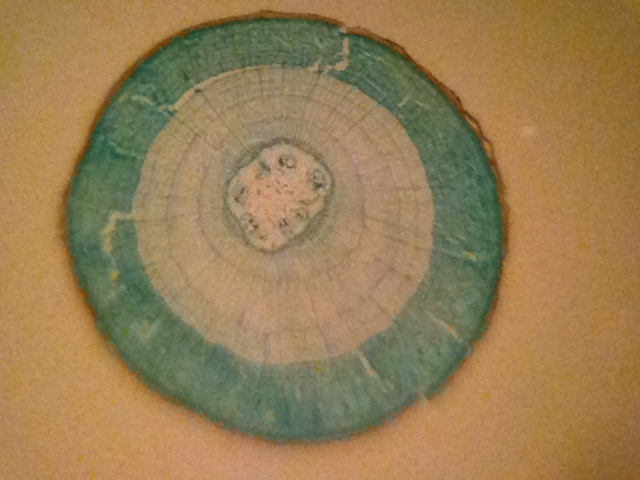
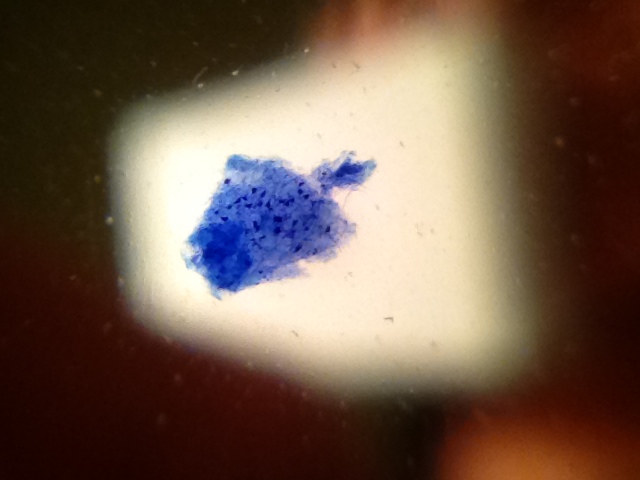
Here we place a microscopy slide containing a cross-section of a Tilia stem.
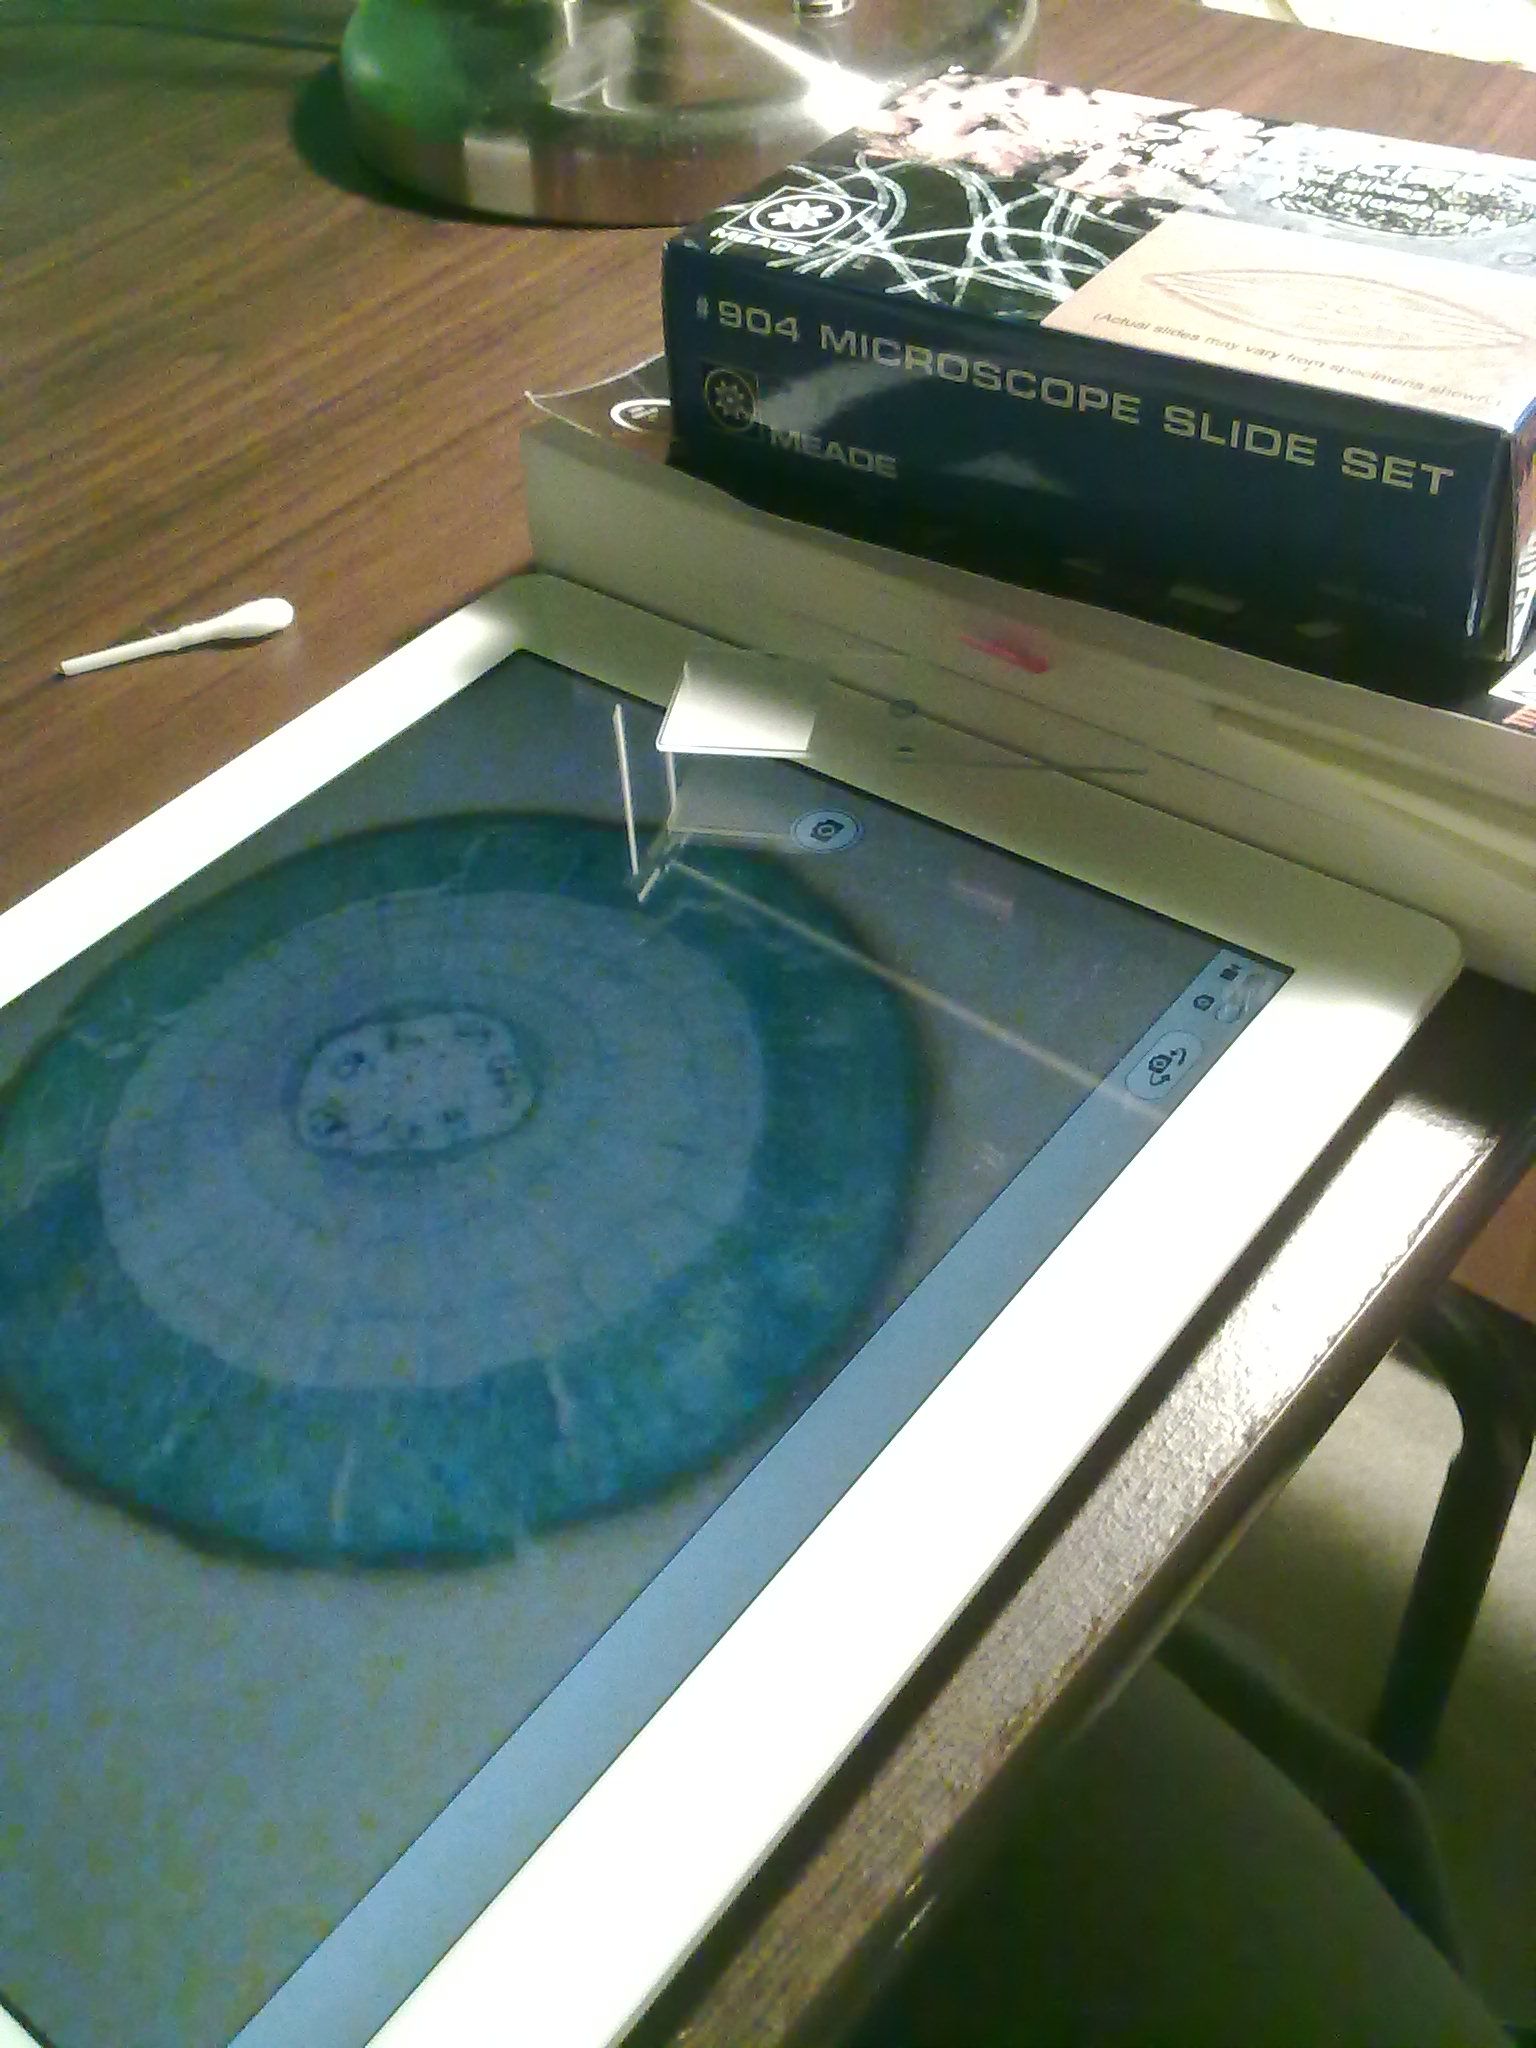
and here is the corresponding image taken with the iPad camera.
It is a bit challenging that the button that must be pressed to take the picture in the iPad is just beside the camera, and therefore ends up just underneath the microscopy slide. To avoid this, you may want to tilt the iPad to get it landscape orientation first, and then place it in the table to use it for observation.
The optics of the water drop are quite good for macro observations. Time to hunt for household objects to take a closer look at them…
Here is a pencil:
and the resulting image taken with the iPad camera:
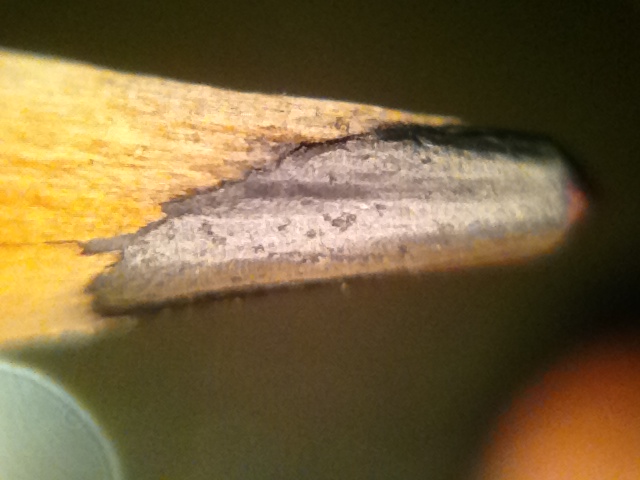
The water drop used here was rather large (about 5mm in diameter), and therefore produces a magnification of just about 20X.
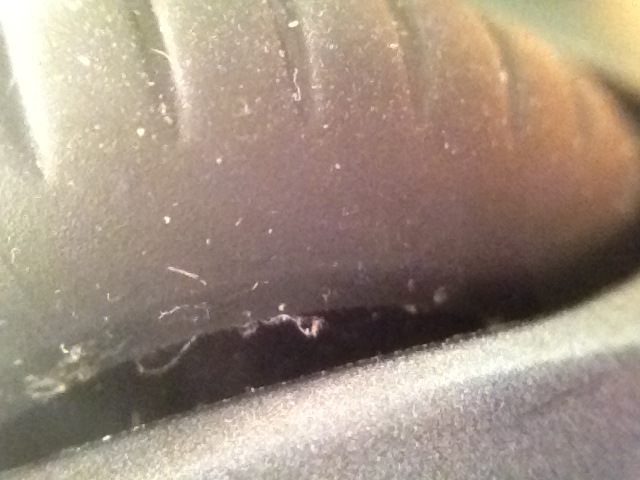
This is good enough for certain interesting observations, for example… when was the last time that you cleaned up your computer mouse ?
 |
 |
You can of course also capture video, and directly upload it to Youtube:
http://www.youtube.com/watch?v=_zL5qQUj7jE&feature=relmfu
The video below, was the result of taking soil from a plant, dissolving it with water and placing it on a glass slide: Life is everywhere…
Inspecting the handle of a pen…
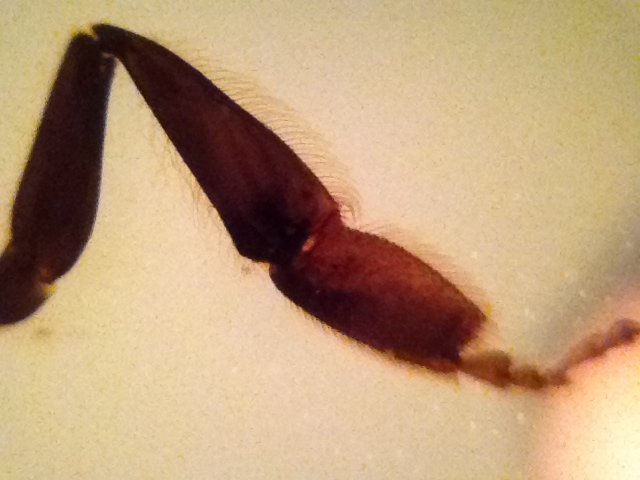
And a Gallery of other images taken as still pictures.
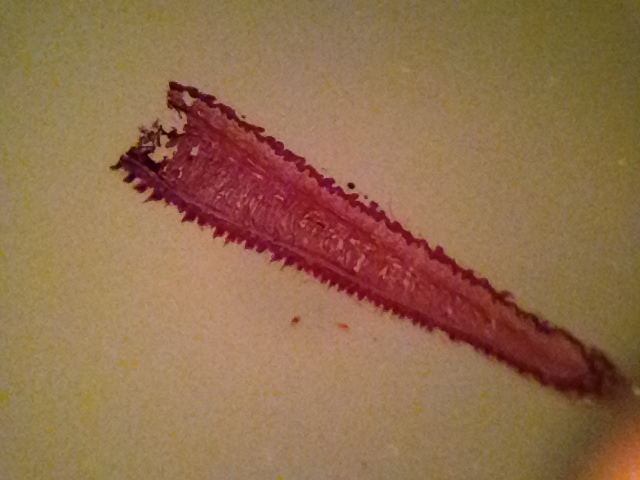
Leg of a bee:
Neurons:
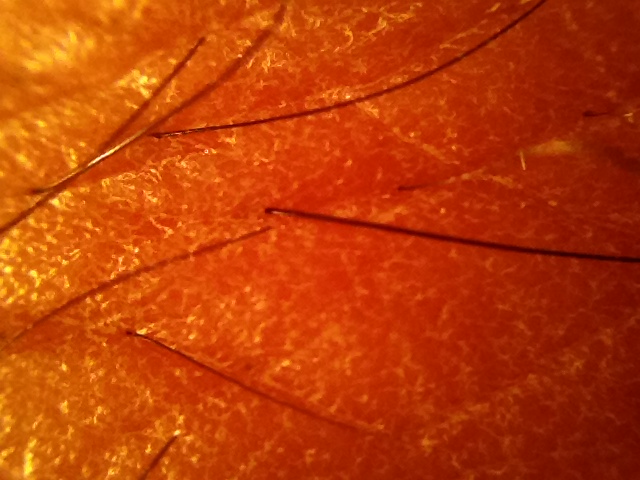
Hand dorsal surface:
Microscopy slide of a tongue (showing papillae filiformes)
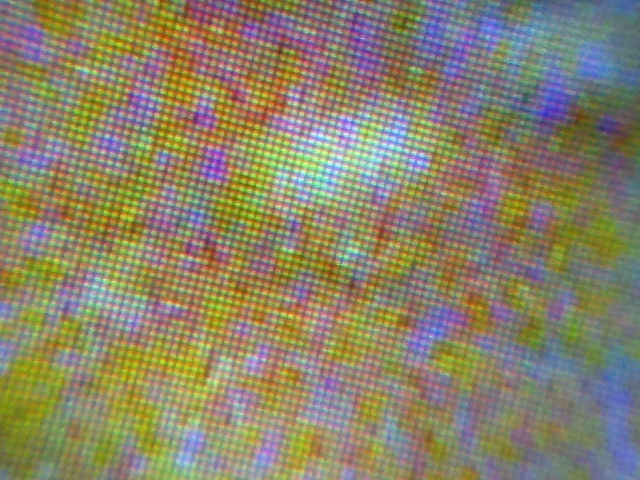
and the screen of a Nokia 5800 phone
Overall, the iPad front camera is not very impressive. It produces images of 640×480 pixels, which is rather low resolution these days.
For the size of the water drop used here, the magnification is such that a the width of the image will map to about five millimeters in the actual sample. Here is the image of a ruler:
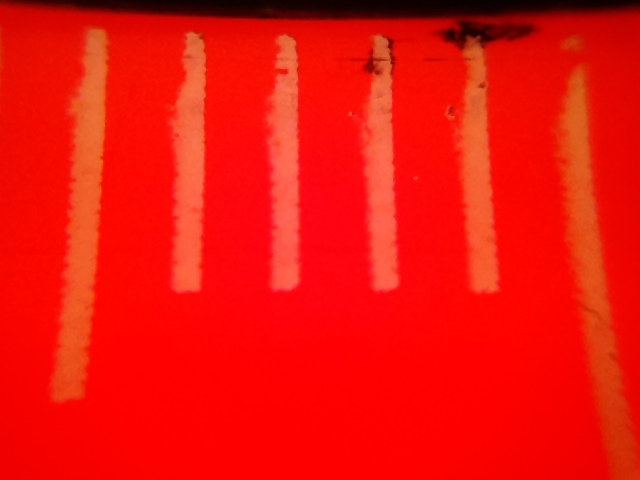
This maps to a resolution of about 10 microns per pixel, which is good enough to see some cells, but not enough to see bacteria. More work is needed to produce smaller water drops.
The illumination for the samples was done with a simple desk lamp, which certainly leaves ample room for improvements on that front…
When it is time to clean up, simply hold the cotton swab on top of the water drop, and gently touch it to absorb the water into the swab.
It is convenient that the glass cover of the iPad has a certain hydrophobic property to it, and therefore the water drop tends to hold together as opposed to spreading over the surface.
Note that as you pass some time observing, the water will evaporate and the drop will flatten, resulting in progressively lower magnifications.
See the continuation of this DIY Series here in: Part II
Interesting References
- Micrographia, by Robert Hooke: Download available at the Gutenberg project: http://www.gutenberg.org/ebooks/15491 (Now in the Public Domain). Note that at the time of the publication of this book (1665), copyright in England was regulated by the Licensing Act of 1662 in the form of giving an exclusive monopoly on printing, to the Stationers Company. Authors did not have a copyright per se, based on a recognition to their creative works. Instead the Stationers Company enjoyed this monopoly in exchange for assisting on the censorship of texts that might be offensive or critical to the crown. The Commons refused to renew the printer’s licensing act in 1695, and in 1710, under Queen Anne, England introduced the first Copyright Act, “…for the encouragement of learning…”, that gave authors the right control the reproduction of their writings, for a limited time. In the case of Micrographia, Hooke got a copyright for 21 years, and therefore the book went into the public domain in 1686.
- Leeuwenhoek letters to the Royal Society:
“Observations, communicated to the Publisher by Mr Antony van Leewenhoeck, in a Dutch letter of the 9th of October 1676. Here Englishe’d: Concerning little animals by him observed in Rain-Well-Sea. and Snow water; and also Water Wherein Pepper had lain infused.”
http://rstl.royalsocietypublishing.org/cgi/doi/10.1098/rstl.1677.0003
Available in Open Access. - “The discovery of micro-organisms by Robert Hooke and Antoni van Leeuwenhoek, Fellows of The Royal Society”
http://rsnr.royalsocietypublishing.org/content/58/2/187
Available in Open Access. - “Cell-Phone-Based Platform for Biomedical Device Development and Education Applications”,
PLoS ONE,
http://www.plosone.org/article/info%3Adoi%2F10.1371%2Fjournal.pone.0017150
Open Access, under CC BY License. - Turn your Cell-Phone into a powerful microscope, Wired, http://www.wired.com/wiredscience/2011/03/diy-cellphone-microscope/
- “Mobile Phone Based Clinical Microscopy for Global Health Applications”,
PLoS ONE,
http://www.plosone.org/article/info:doi%2F10.1371%2Fjournal.pone.0006320,
Open Access, under CC BY License. - “Transform your iPhone into a Microscope, just add Water”, Scientific American,
http://blogs.scientificamerican.com/compound-eye/2012/03/12/transform-your-iphone-into-a-microscope-just-add-water/ - “How to turn your iPhone into a microscope with a drop of water”
http://www.iphoneincanada.ca/how-to/how-to-turn-your-iphone-into-a-microscope-with-a-drop-of-water-diy-hack/