HPCCloud: HPC simulation workflow in the cloud
![]()
HPCCloud v0.9 is now available. This post introduces HPCCloud and some of the features that the release delivers.
Introduction
HPCCloud is a web-based simulation environment that utilizes web technologies to deliver an innovative Software as a Service (SaaS) advanced modeling and simulation environment. The platform allows the user to take existing computational code that is designed to run on a high-performance computing (HPC) resource and develop an end-to-end simulation workflow, from input generation right through to post-processing. HPCCloud presents the workflows through a simple, intuitive user interface (UI), which shields the user from much of the complexity that comes with running a simulation code on an HPC resource.
One of the core features of HPCCloud is the ability to create clusters using a cloud provider such as Amazon’s Elastic Compute Cloud (EC2). HPCCloud can tailor the clusters to a particular simulation workflow in terms of size, specification of the nodes and software provisioned. These clusters are created on demand and can be shutdown when the workflow is complete. Therefore, costs only incur when the workflow is active; there are no ongoing maintenance costs like those associated with “traditional” HPC clusters.
HPCCloud comes with a couple of built-in workflows such as one that allows PyFR simulations to be run. The workflow visualizes the results with ParaViewWeb. HPCCloud makes it straightforward to add new simulation workflows to support a wide range of domains and applications.
Getting Started
The HPCCloud stack can be deployed using Ansible. Vagrant offers the quickest way to get things up and running. With a Vagrant deployment, the full stack is deployed on a single virtual machine. The demo mode also provisions the virtual machine as a “cluster” on which to run toy jobs. (This mode is not recommended for running in production.)
A Vagrant deployment has the following requirements:
Once the dependencies have installed, run the following commands to clone the deployment repository and create the virtual machine. Note that the stack will use ports 8080 (Girder app) and 8888 (HPCCloud app), so these should be free on the machine.
git clone git@github.com:Kitware/HPCCloud-deploy.git HPCCloud
cd HPCCloud
git checkout v0.9.0
DEMO=1 vagrant up
When the provisioning process has completed (note that this will take some time), access to HPCCloud becomes available at http://localhost:8888. A demo account will have been created with username “hpccloud“ and password “letmein.”
Projects and simulations
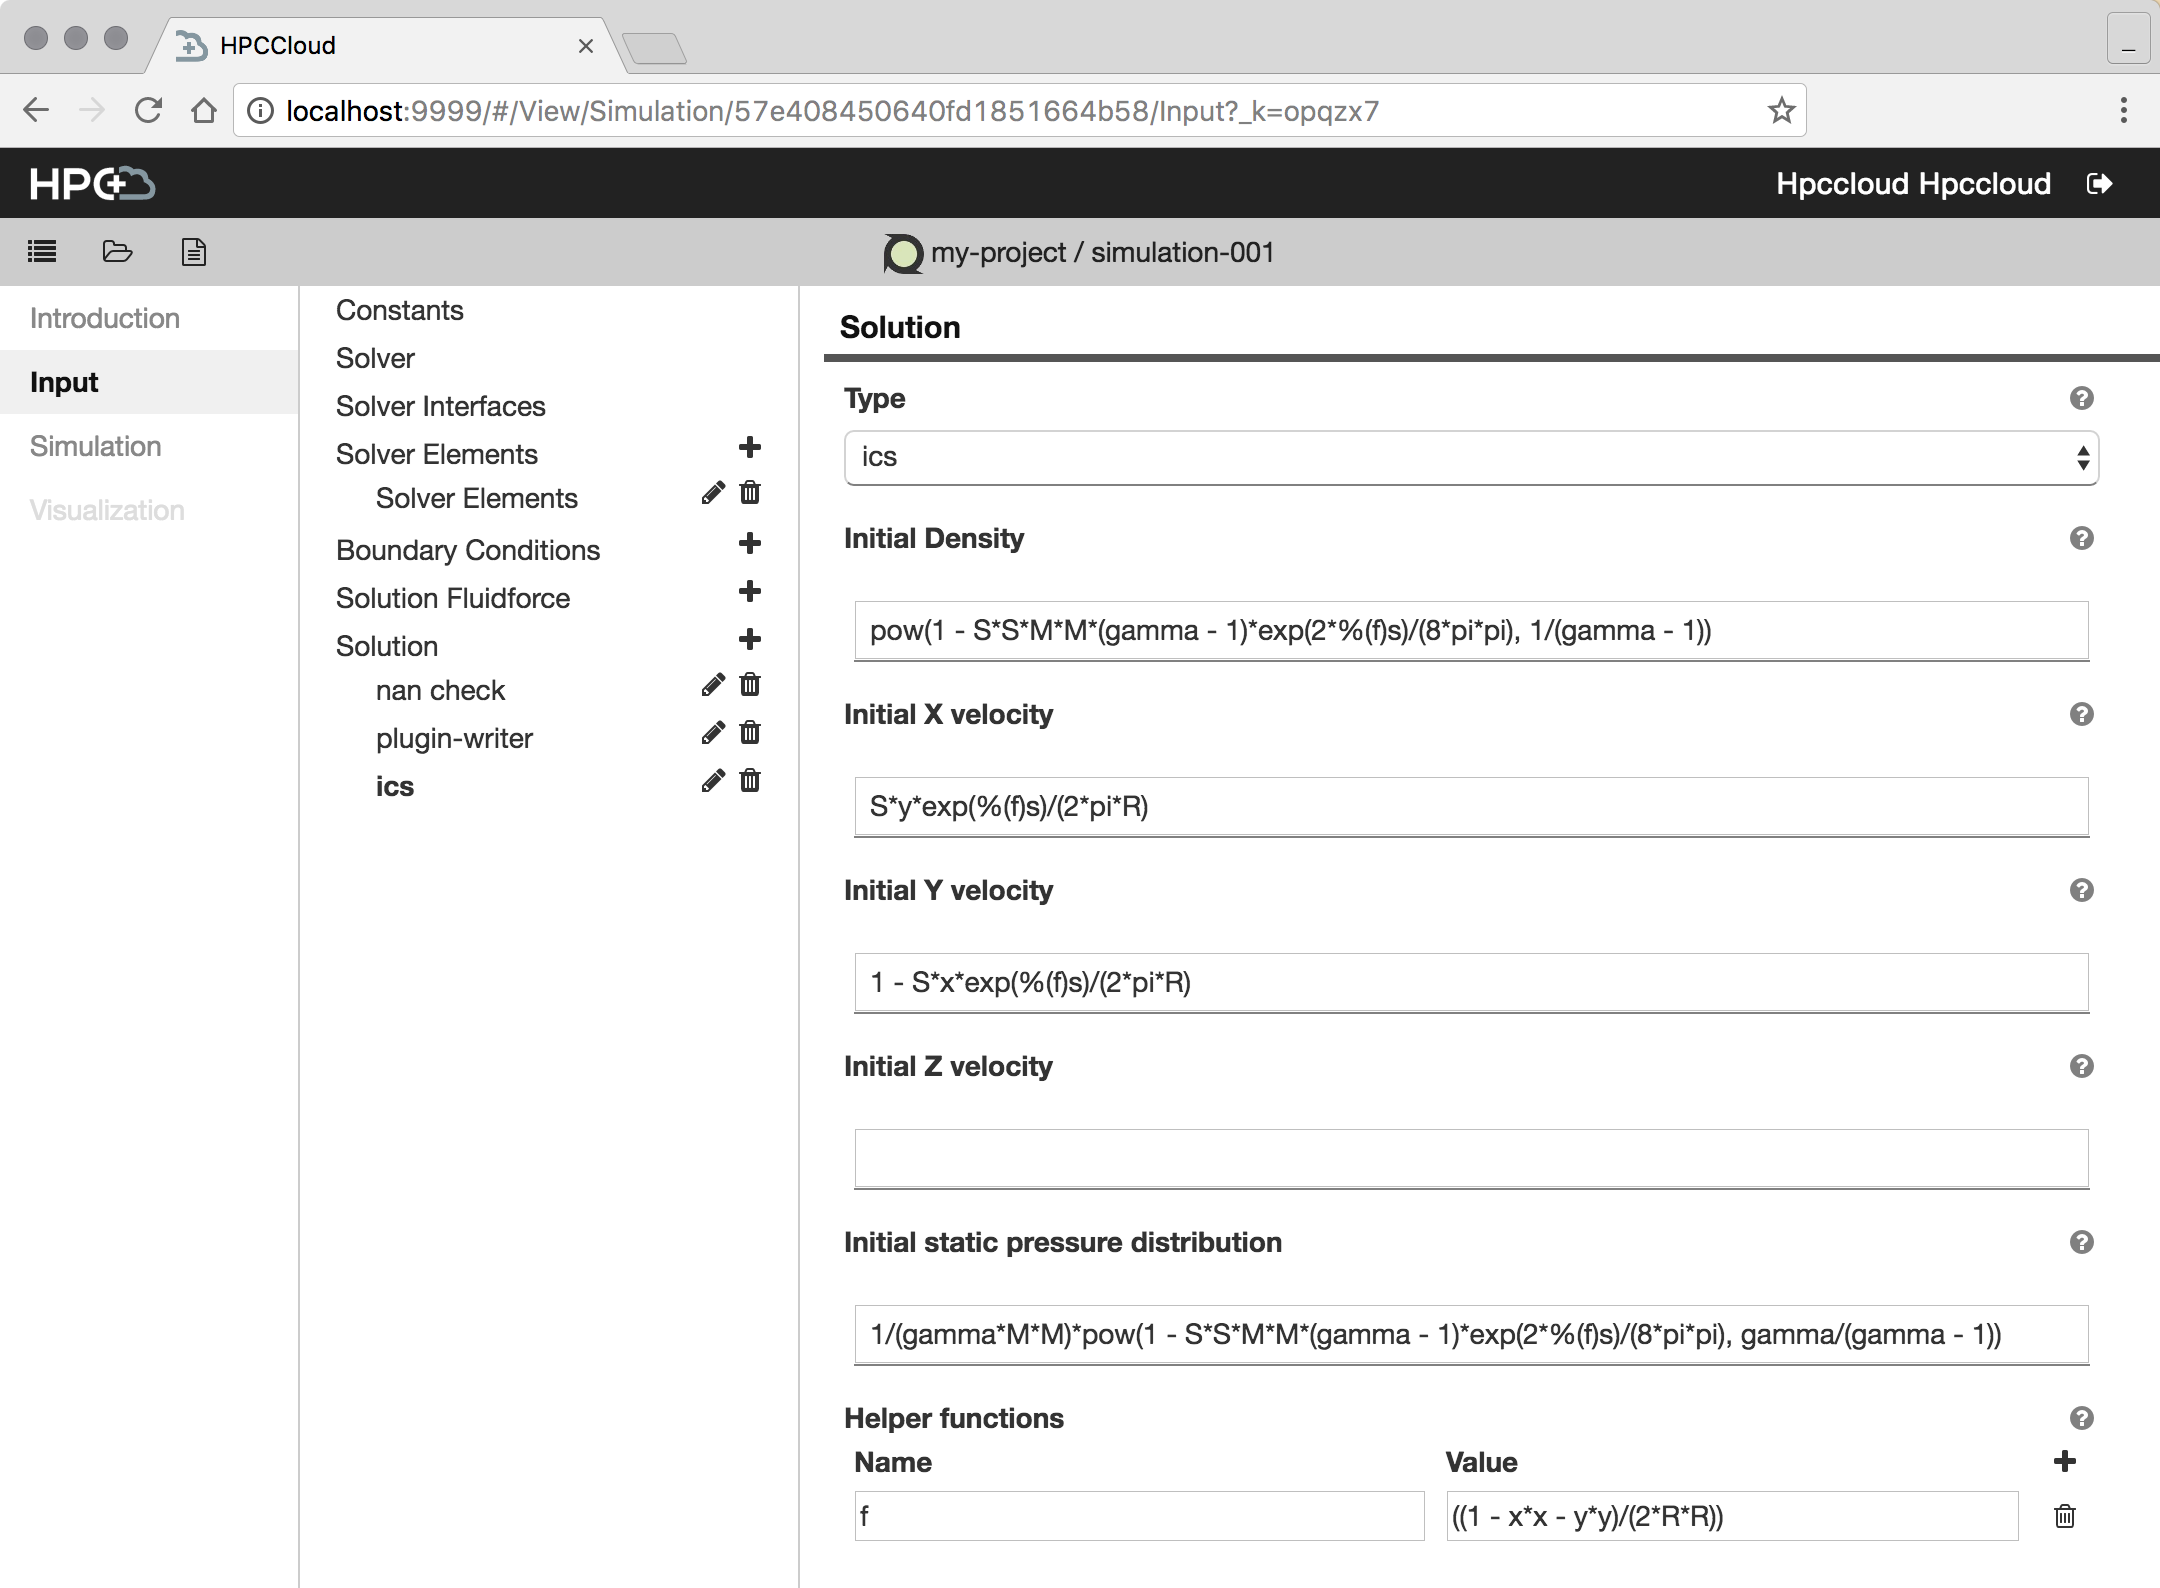
HPCCloud uses the concept of projects to organize simulation runs. A project also determines the particular simulation workflow that will be followed for a simulation run. Simulations are created within a project, as they are instances of a particular simulation workflow. A simulation leads the user through the workflow steps. So, adding a new simulation workflow to HPCCloud involves implementing a new project type and its associated simulation. The below image shows the “Input Generation” step of the PyFR simulation workflow.
Access to HPC resources
A simulation workflow needs to run on an HPC resource. HPCCloud supports two types of resources: “Traditional” clusters are what most people think of as HPC resources. These are dedicated statically provisioning machines. HPCCloud also provides the ability to create dynamic clusters in Amazon Elastic Compute Cloud (EC2). HPCCloud simulation workflows are portable across HPC resources. So, the same workflow can run on a traditional cluster as well as on a cloud cluster. The HPCCloud infrastructure shields the workflow developer from many of the differences between these two resource types. The following sections detail how to set up access to these two different types of resources.
Traditional HPC cluster
HPCCloud accesses traditional clusters using SSH. In order to run simulation workflows on a cluster, a key pair needs to be setup to give HPCCloud secure access to the cluster. Note that the cluster must support key-based SSH access.
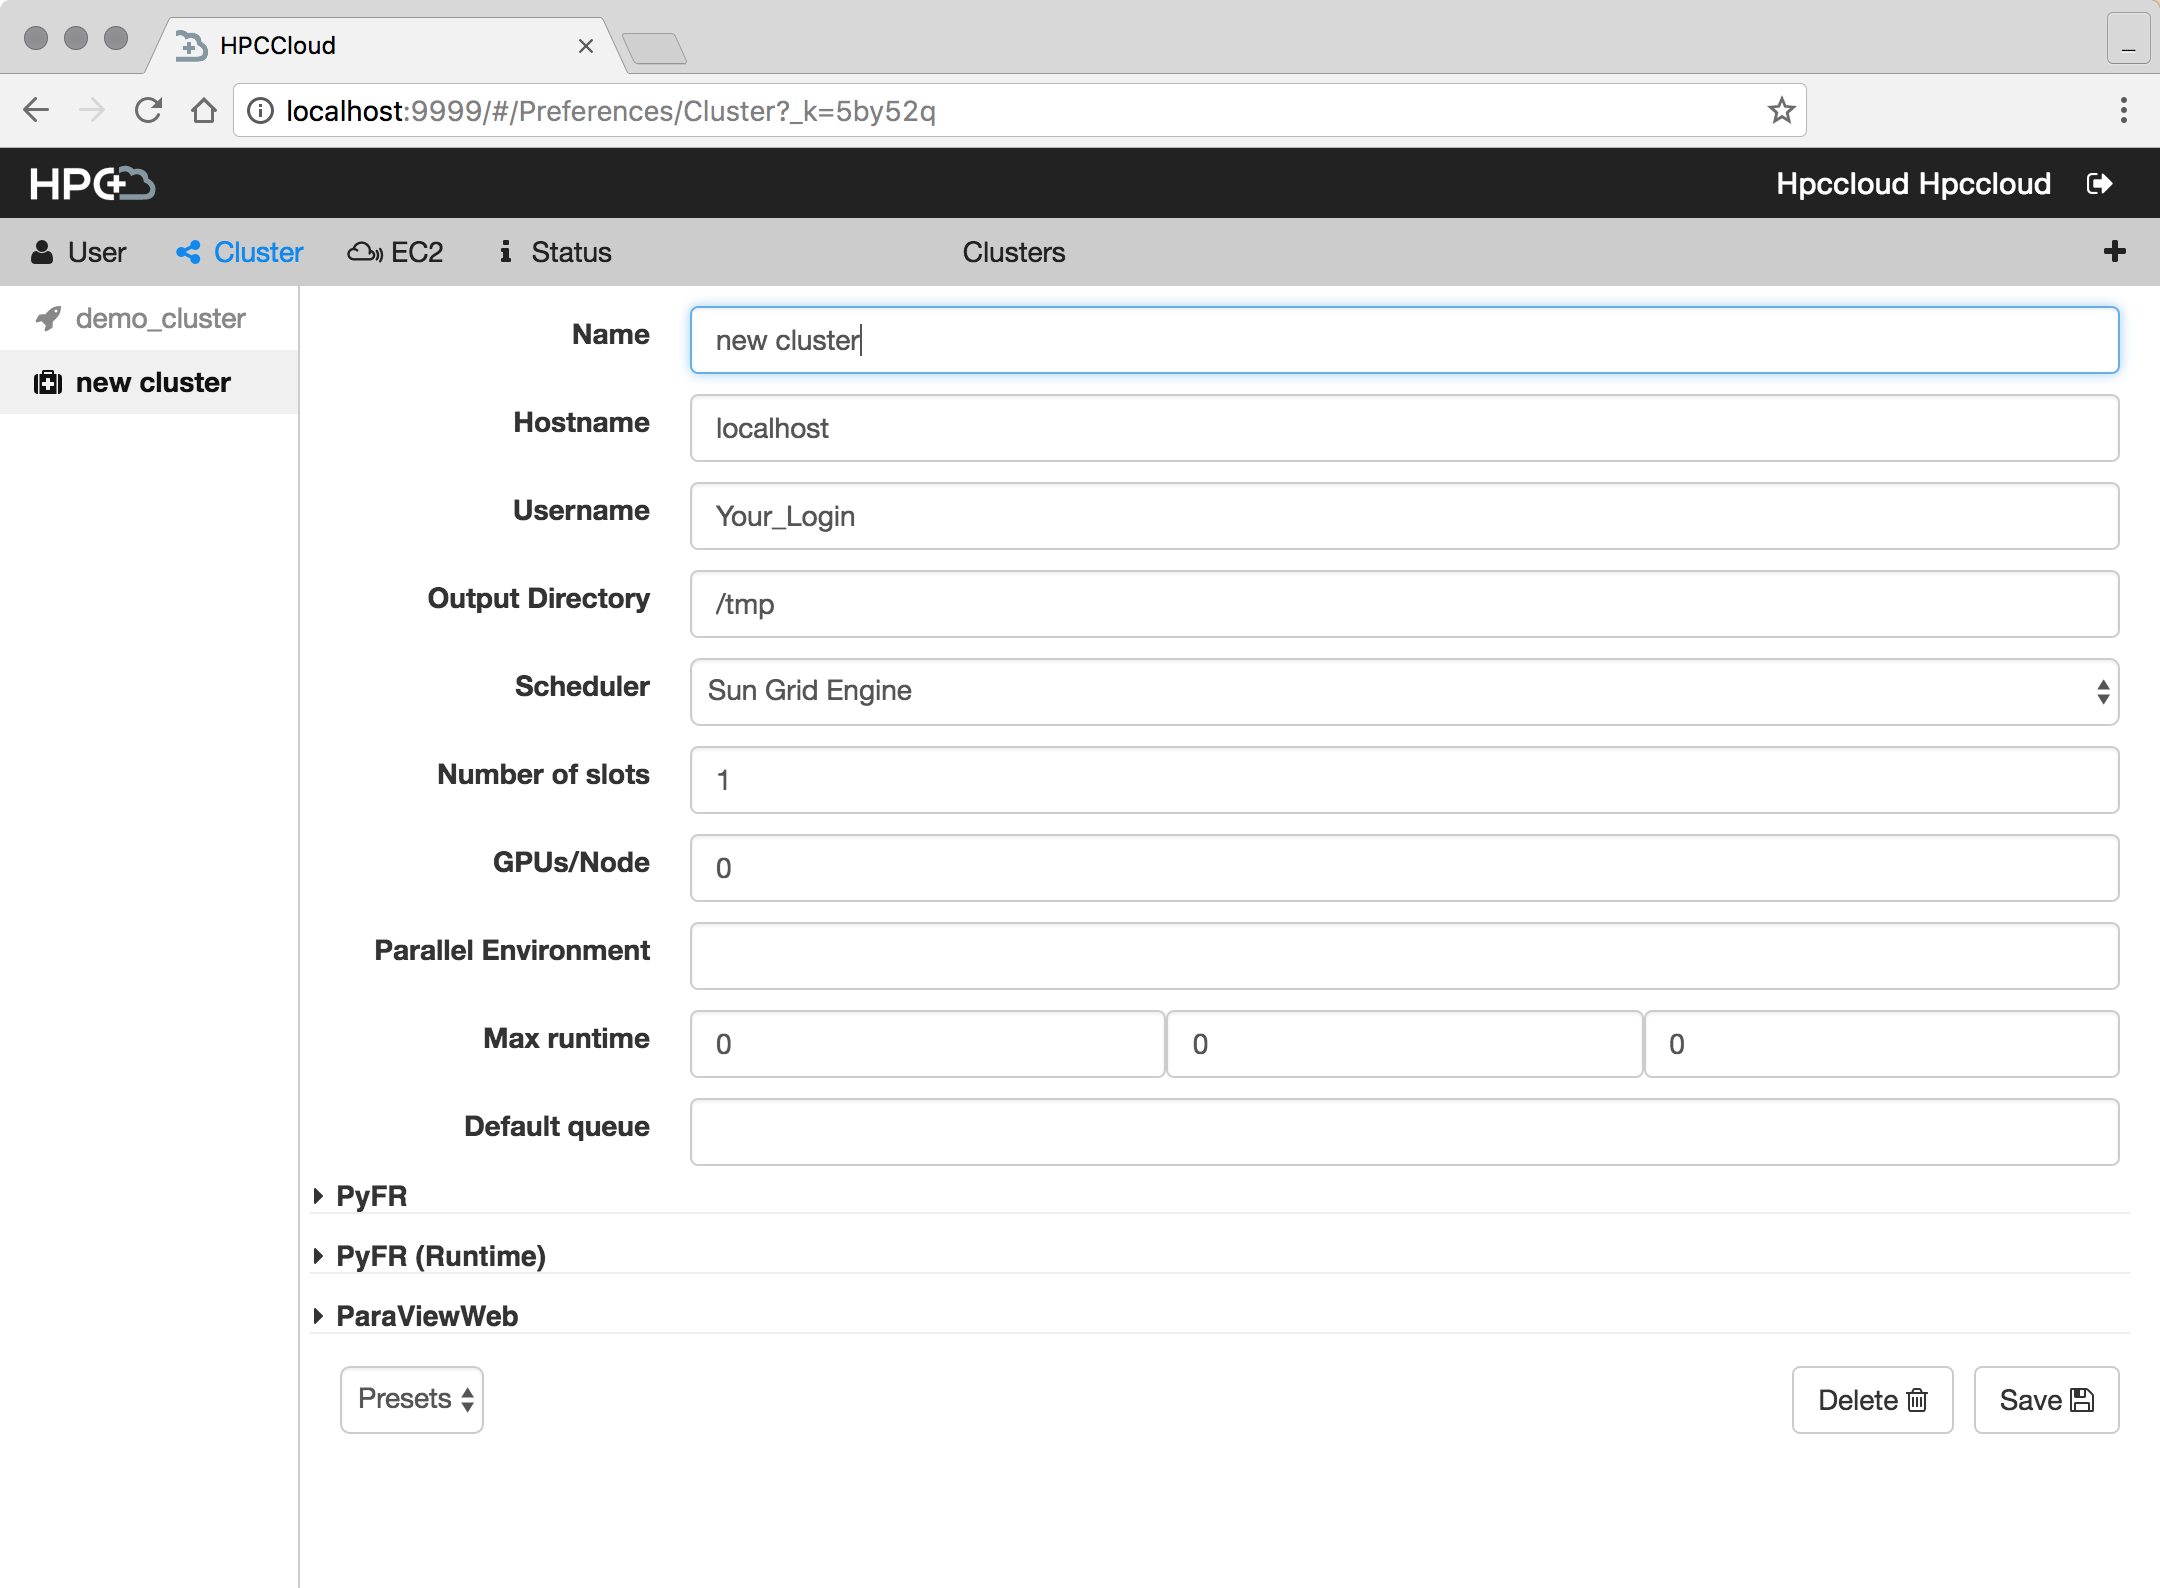
To go to the preference page, click on the username in the top right, and select “Cluster.” Click the “+” icon in the toolbar. HPCCloud will present a blank form in which to fill out details of the cluster. The form requires a cluster name, a username and the hostname of the machine. When the necessary fields are filled out, click “Save.” HPCCloud will then generate a SSH key pair for the cluster.
A “Test” button and a form field with a shell command containing the public key will soon appear. This command will copy the public key to the authorized_keys file of the user account to access the cluster. Execute this command to add the public key so that HPCCloud can connect with it and run simulations. Once this command has executed, click on “Test.” This will test the connection to the cluster to ensure that the key pair has successfully set up and that HPCCloud can run jobs on the cluster. Note that there is also a workflow-specific configuration that HPCCloud may require to receive the information it needs to run a particular workflow. For example, in the case of PyFR, this information details the back-ends that the cluster supports.
Amazon Elastic Compute Cloud (EC2) clusters
The creation of EC2 instances require access credentials so that the appropriate account is billed for the resources used. HPCCloud uses an AWS profile to manage these access credentials. The profile contains an AWS access key and region information needed to connect to AWS. This access key will be used by HPCCloud to authenticate with AWS application programming interfaces (APIs) in order to launch the cloud instances needed to create dynamic clusters.
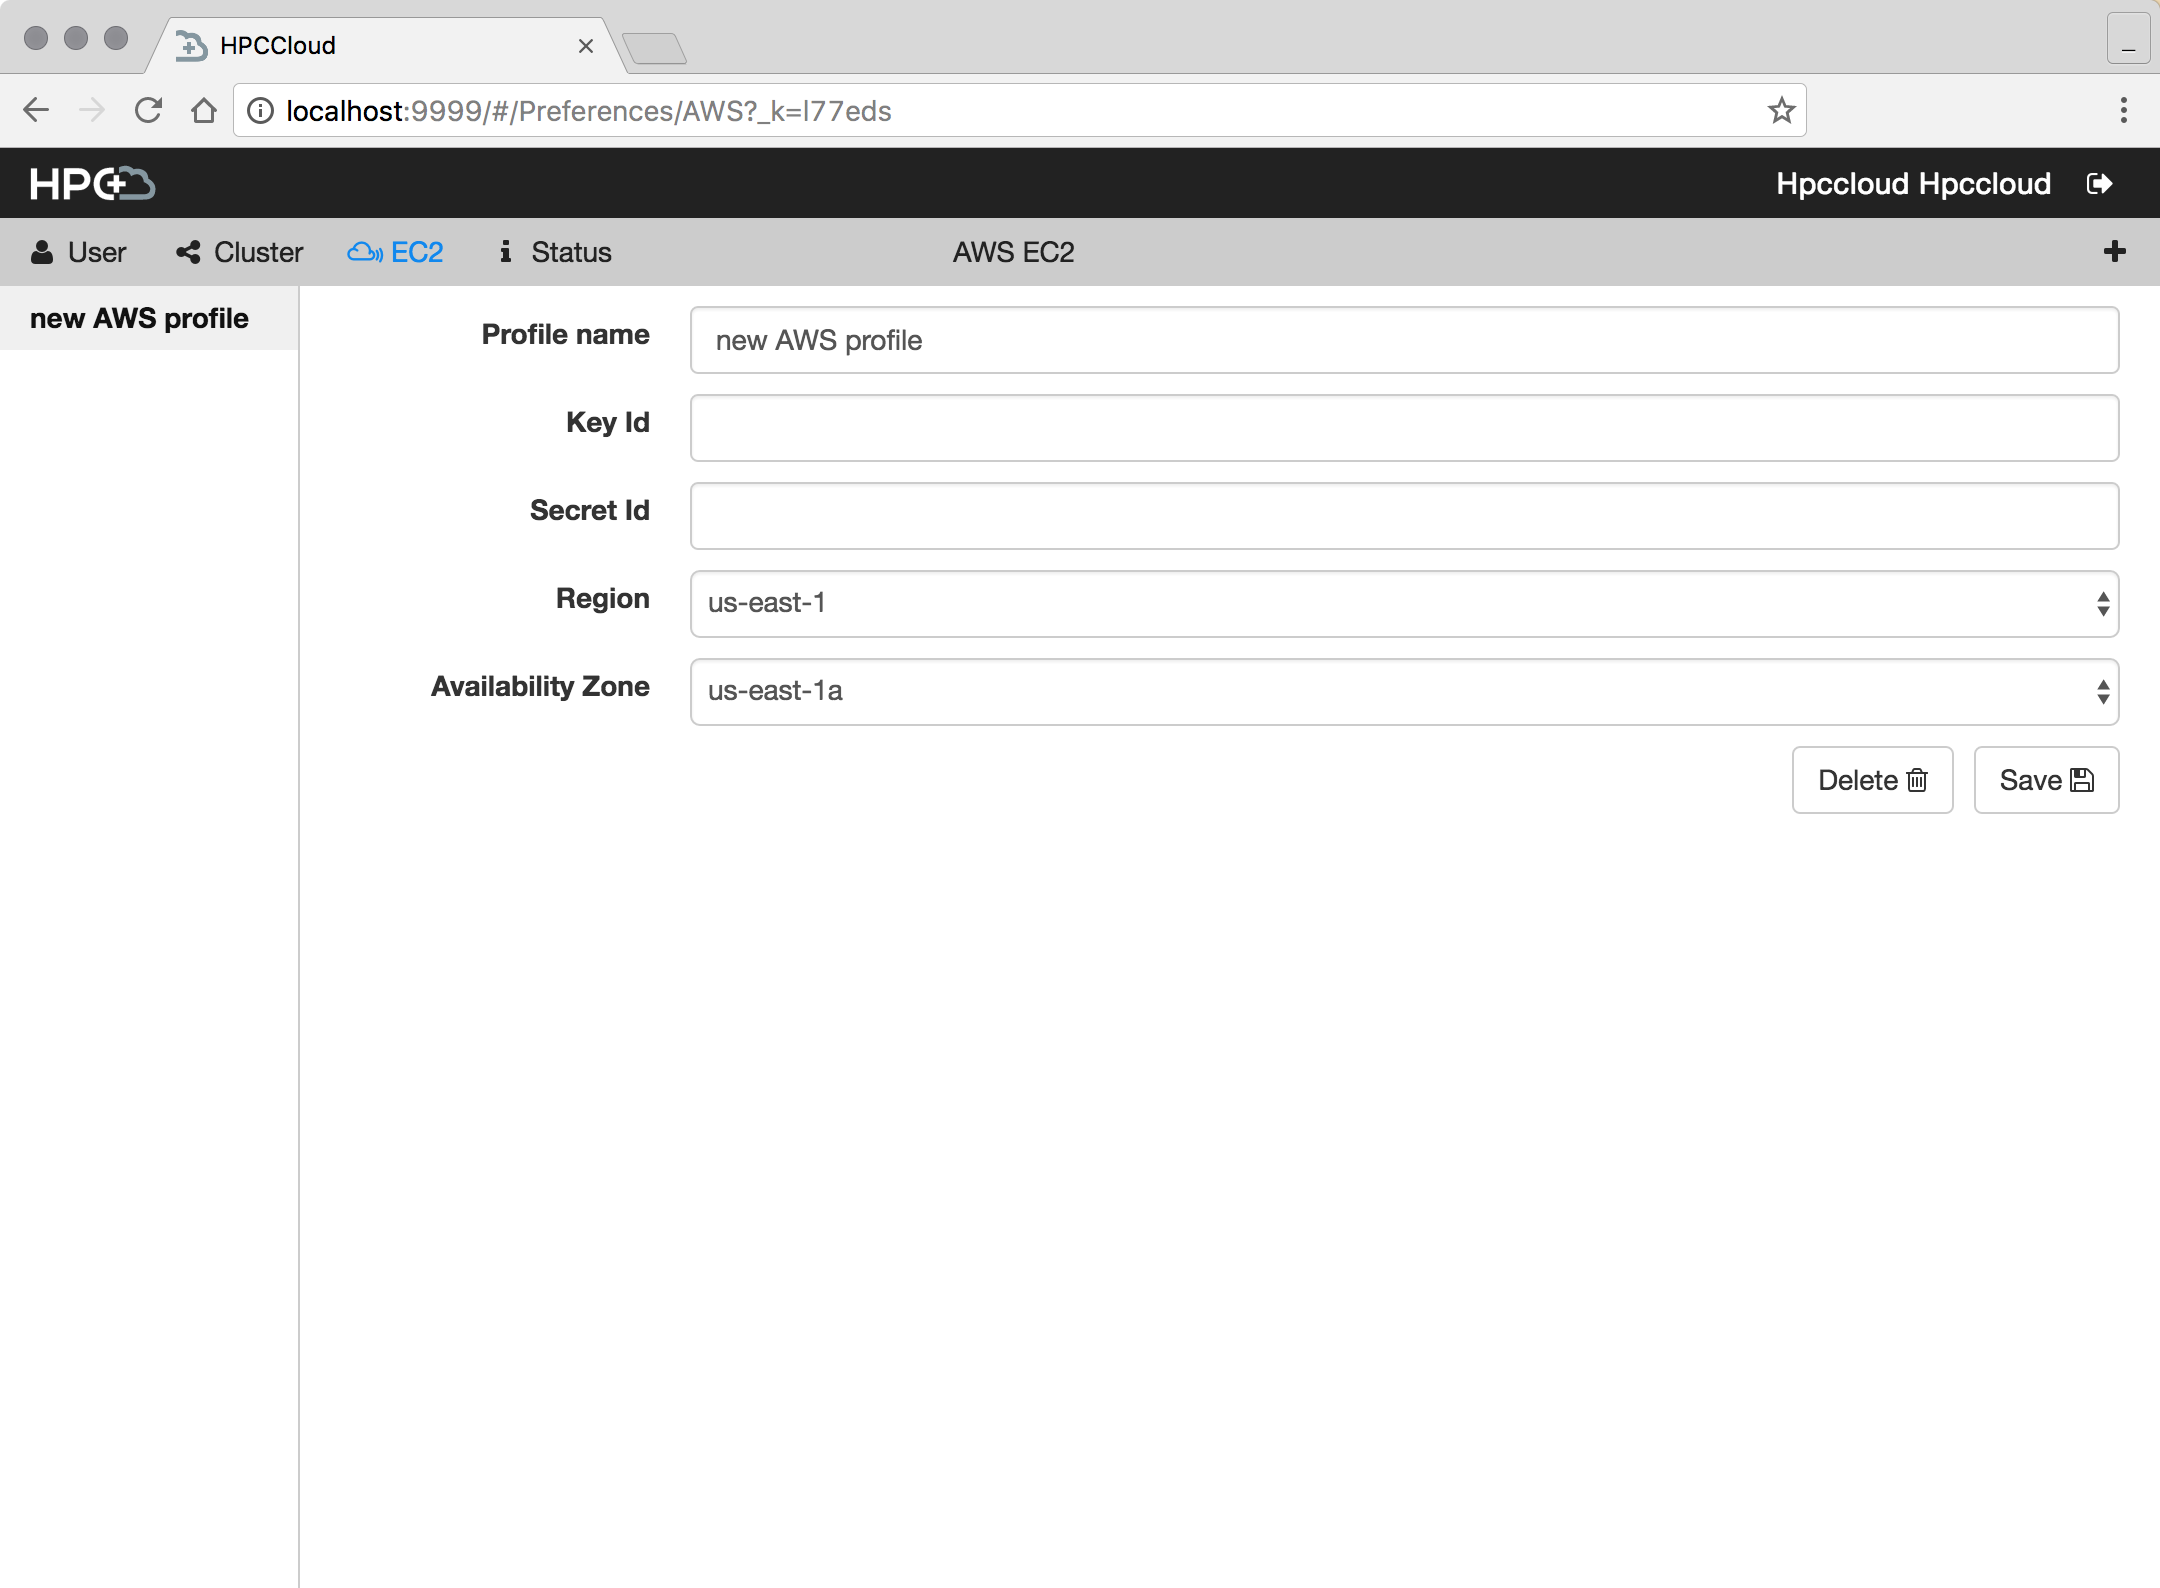
In order to create a new AWS profile, go to the preference page and click “EC2.” Click the “+” icon in the toolbar. In the blank form that appears, fill out the details of the AWS profile. Most important are AWS key and secret key. If necessary, select a different region and availability zone; us-east(a) is selected by default. Click “Save Profile” and the AWS credentials will be validated. If they’re valid, the profile will save. The profile will be added to the list in the sidebar, and it becomes possible to launch and provision EC2 instances from a workflow. Note that HPCCloud currently only supports U.S. regions. Please contact us if you are interested in launching clusters in another region.
When running simulation workflows on dynamic EC2 clusters, it is important to ensure that the cluster is terminated once the simulation workflow is no longer needed, otherwise continued costs will incur. HPCCloud provides the ability to terminate a cluster in the simulation view. The AWS Management console can be used to confirm that all resources have been cleaned up at the end of a session.
Running simple PyFR workflow with Simput
The PyFR workflow has three stages:
- Input generation – HPCCloud’s Simput component will generate an input desk for the simulation.
- Simulation – The simulation code will run on the demo cluster.
- Visualization – Finally we will visualize the results using ParaViewWeb.
These steps run a simple end-to-end simulation workflow. The demo VM comes provisioned with a traditional cluster that can be used to run this example.
- Create a project and select the type “pyfr.” Name the project, and then upload the mesh input file (right click and “Save Link As…” to download).
- Create a simulation and name it.
- Go to the new simulation and click on the “Input” step on the left side bar.
- Follow the Simput instructions for PyFr, which HPCCloud docs outlines.
- Click on the “Simulation” step in the left side bar, then select the demo cluster.

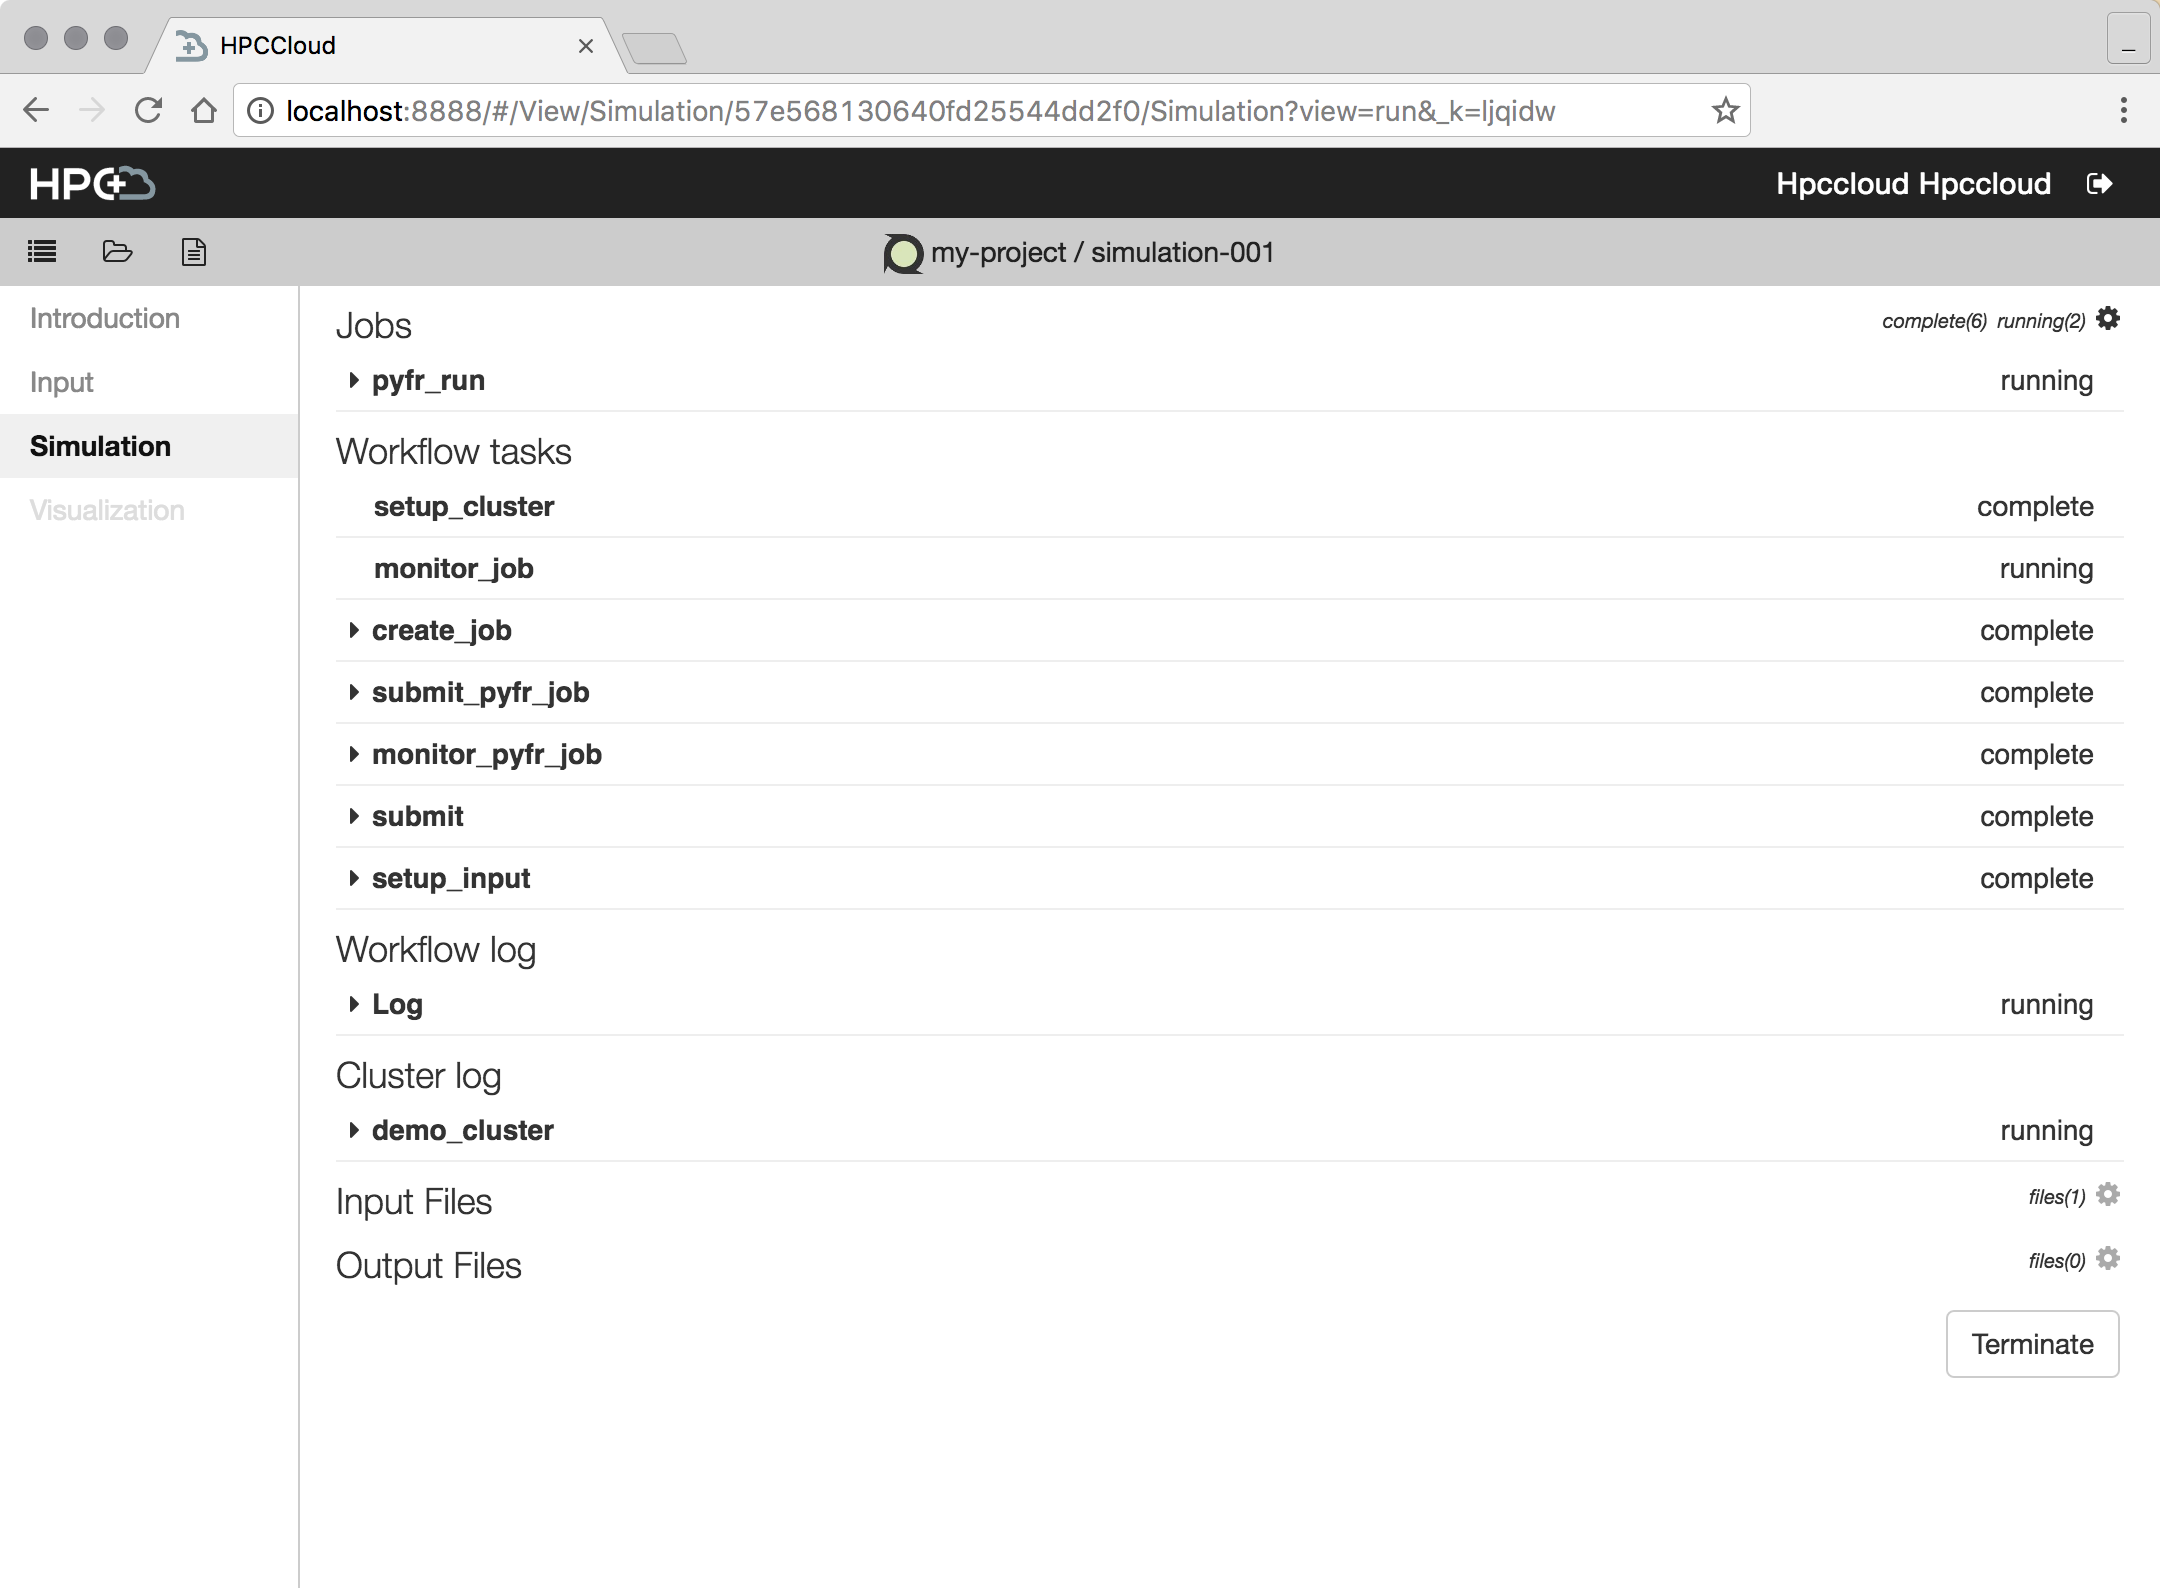
Adding a new traditional cluster to HPCCloud. - Click “Run Simulation” to go to the “Simulation View” sub-step. Here you can view logs and statuses of both tasks and jobs. When they all reach the “Complete” status, the simulation has completed. A “Visualize” button will appear. Click on it to move the the next step.
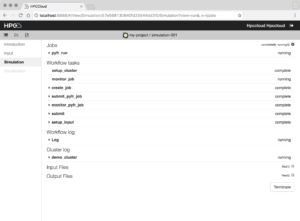
- In the “Visualization” step, select the server and click “Start Visualization.” It will go to a job monitor page similar to the one for the “Simulation” step described in step 6.
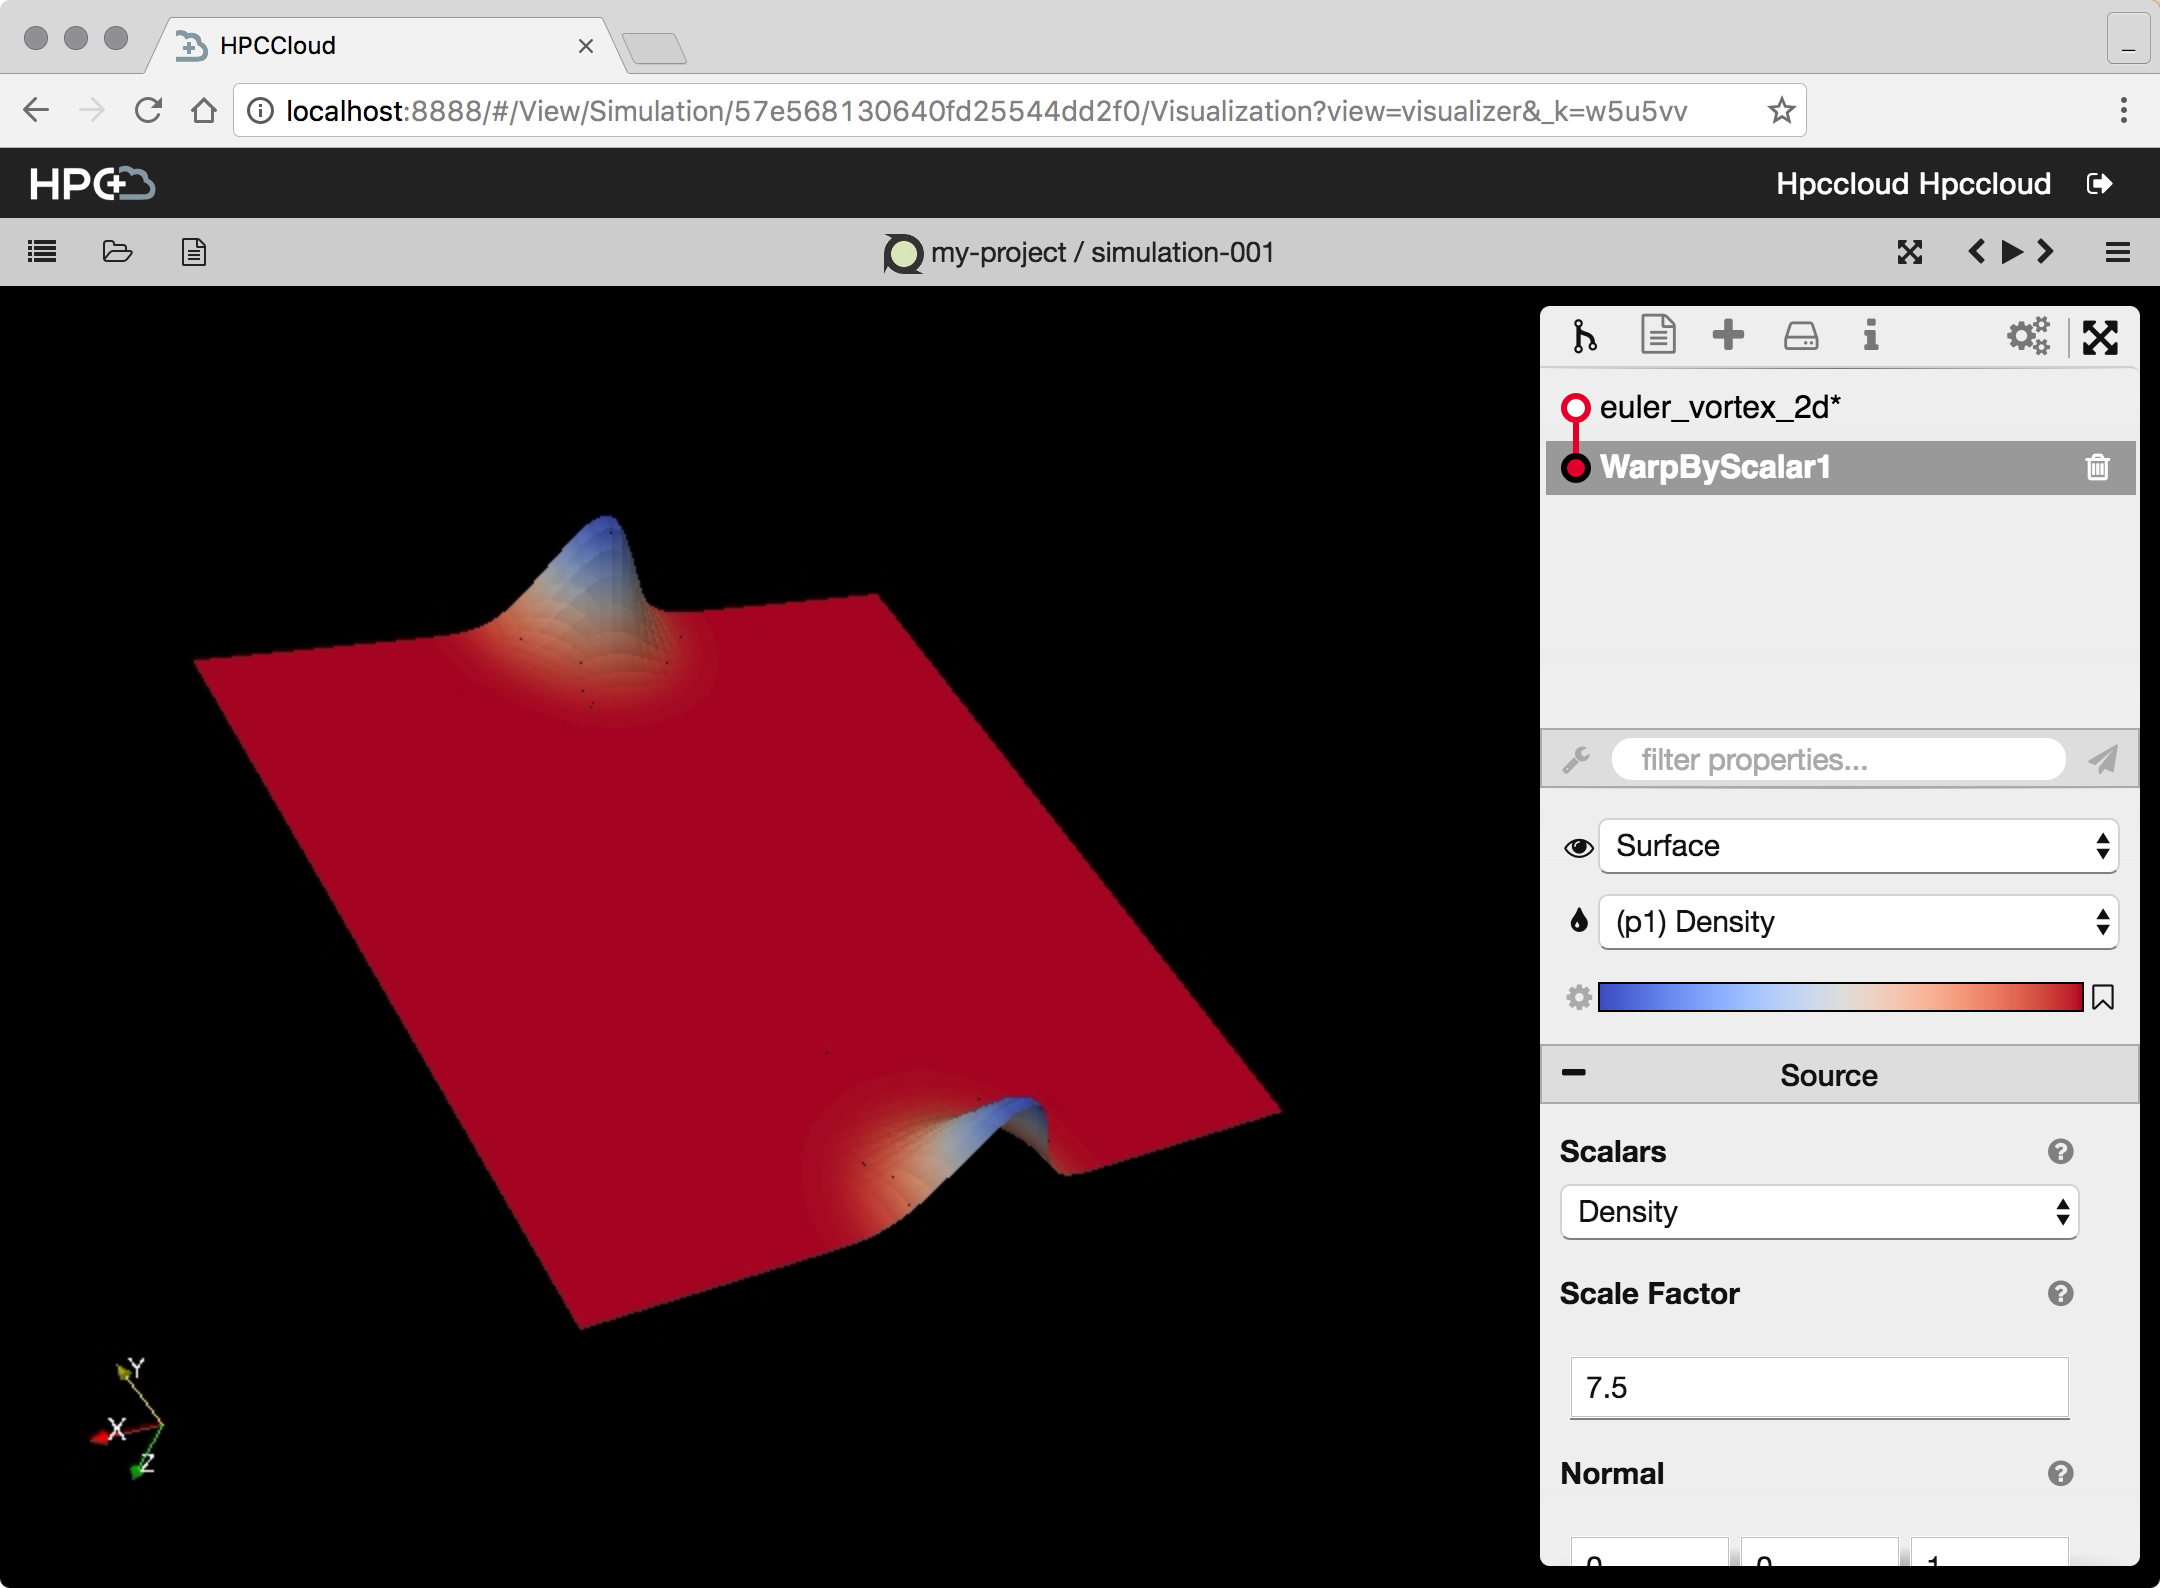
- Wait for the tasks to complete, and the primary job (ParaViewWeb) to run. A button labeled “Visualize” will appear. Click this to go to the ParaViewWeb tool in the browser to view and manipulate the output of the simulation.
Getting Involved
HPCCloud and its components are open source under the following repositories:
- HPCCloud (the HPCCloud application code);
- Cumulus (the backend components that support cluster management/access);
- Simput (the client side library used to provide UI for input generation); and
- HPCCloud-deploy (the ansible playbooks used to deploy the HPCCloud stack).
This work was supported by the Office of Nuclear Energy, of the U.S. Department of Energy under Contract No. DE-SC0012037, through the SBIR grant “Web-Based Computational Model Builder for Nuclear Energy Advanced Modeling & Simulation”, under program manager Dan Funk.